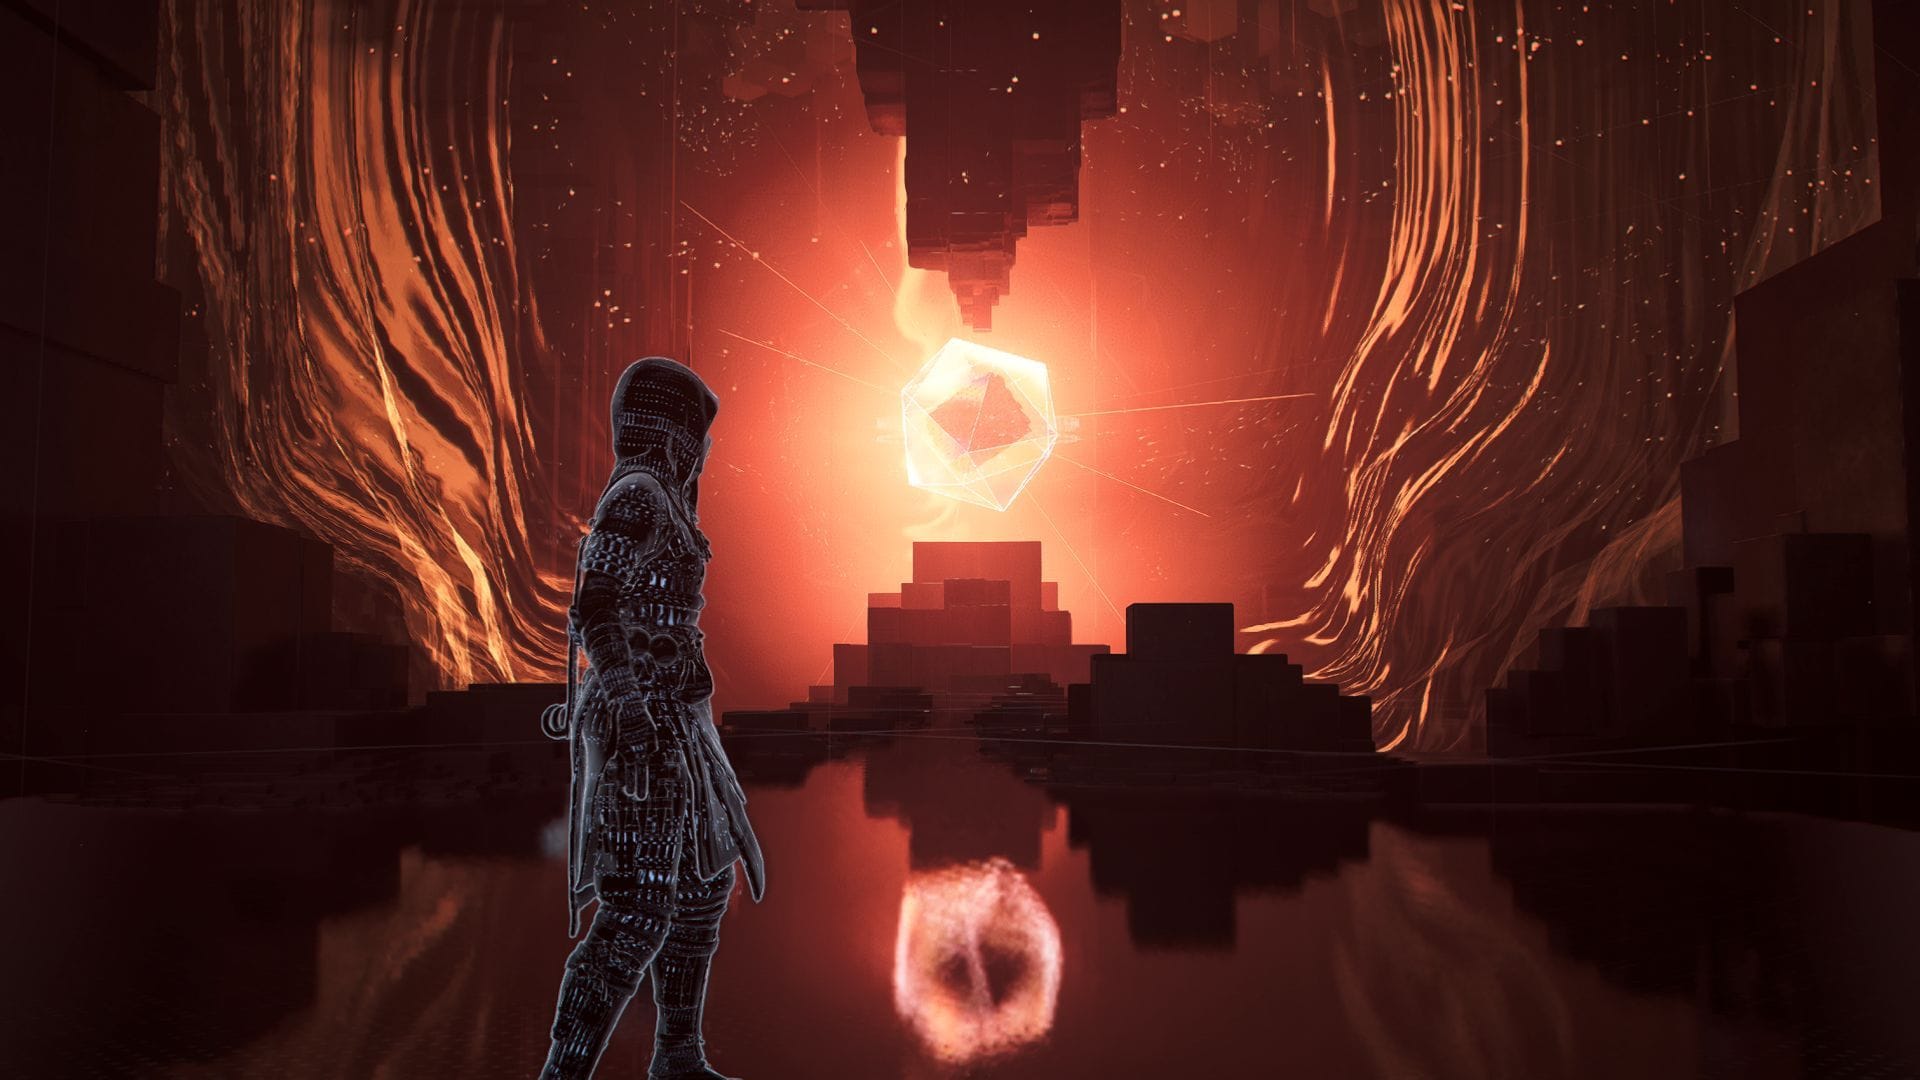
Lost and Found is the brand new Animus Rift quest in Assassin’s Creed Shadows, added after Title Update 1.1.7. The Eagle guides you contained in the rift, and you might be required to make your method to the tip to uncover secrets and techniques. Also, there’s an incredible boss battle on the finish as nicely. Completing the mission grants you outstanding weapons for Naoe and Yasuke.
Here are the small print on how one can full the Lost and Found quest in Assassin’s Creed Shadows.
Lost and Found quest in Assassin’s Creed Shadows: Location
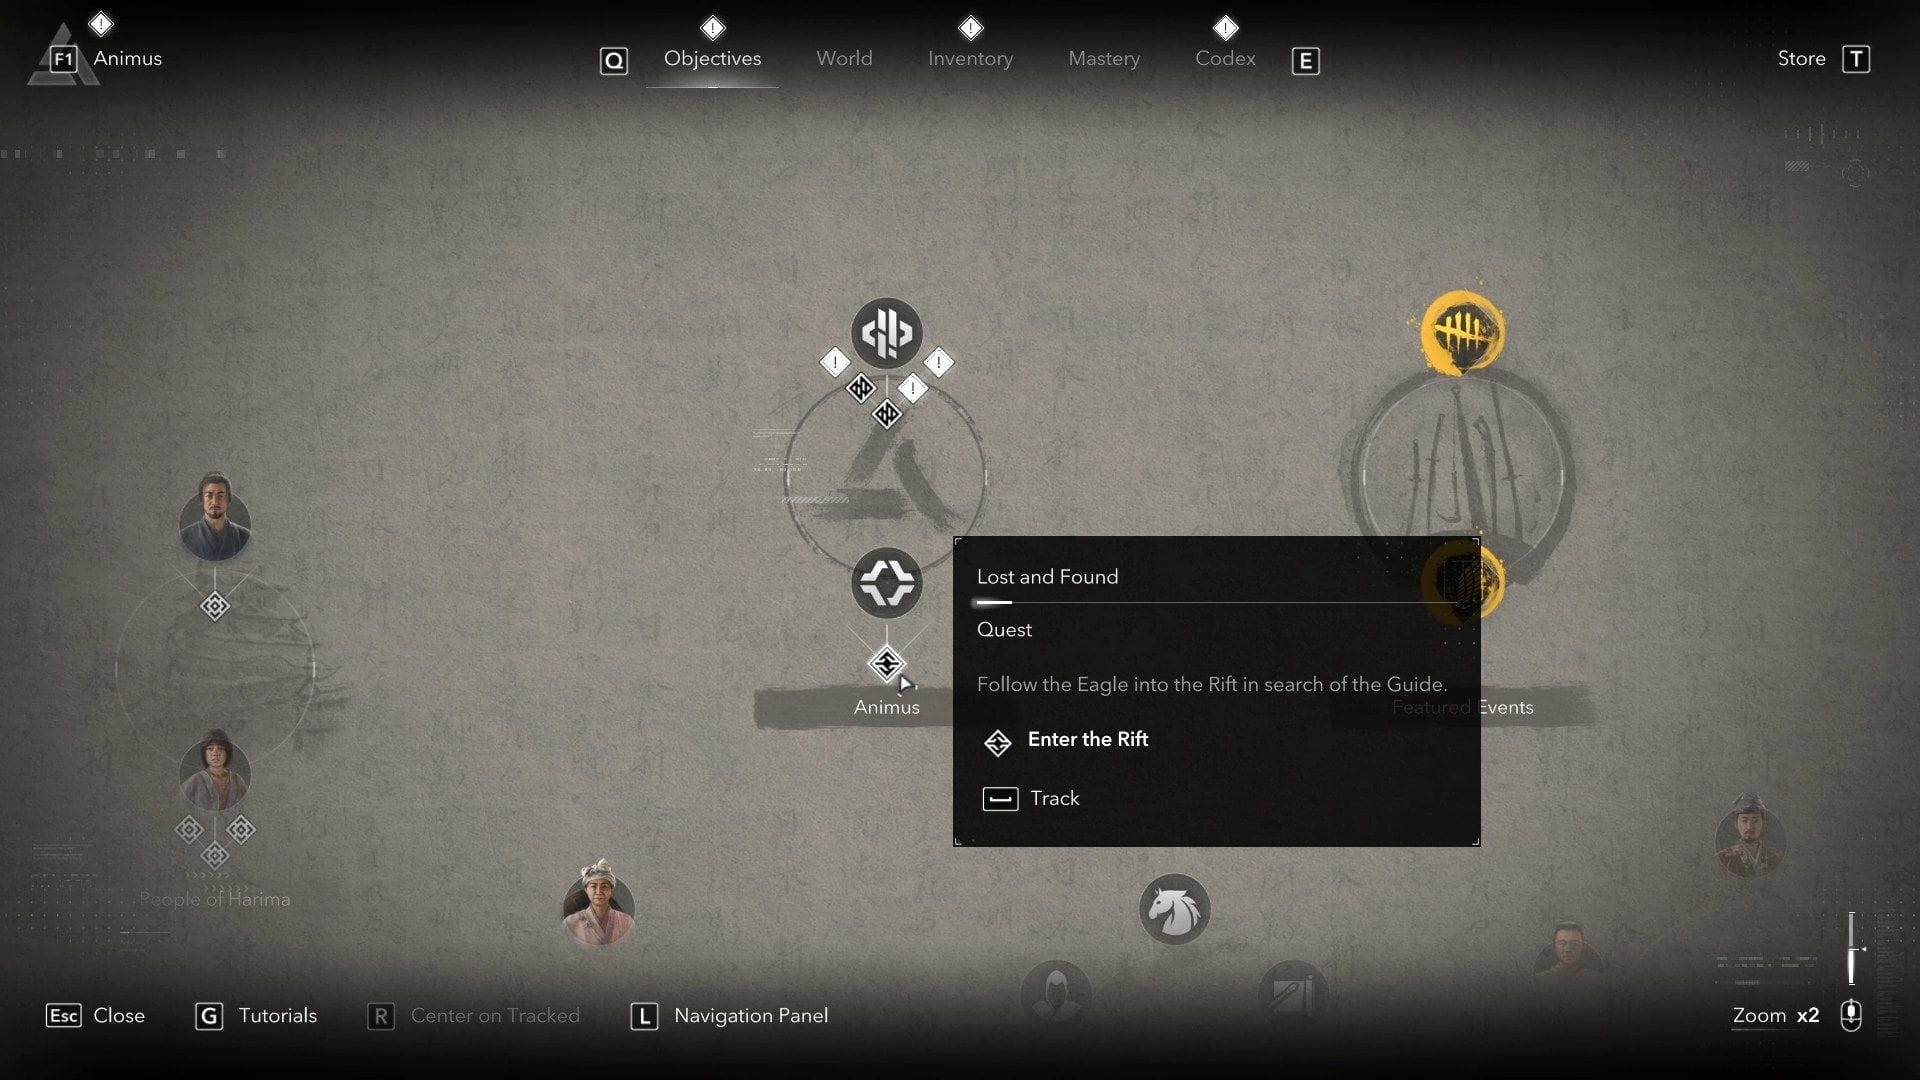
After putting in the Title Update 1.1.7, hop into AC Shadows, and it is possible for you to to see the brand new Animus Rift quest, Lost and Found, on the target board. However, you must full the earlier Animus Rift quests for this one to look.
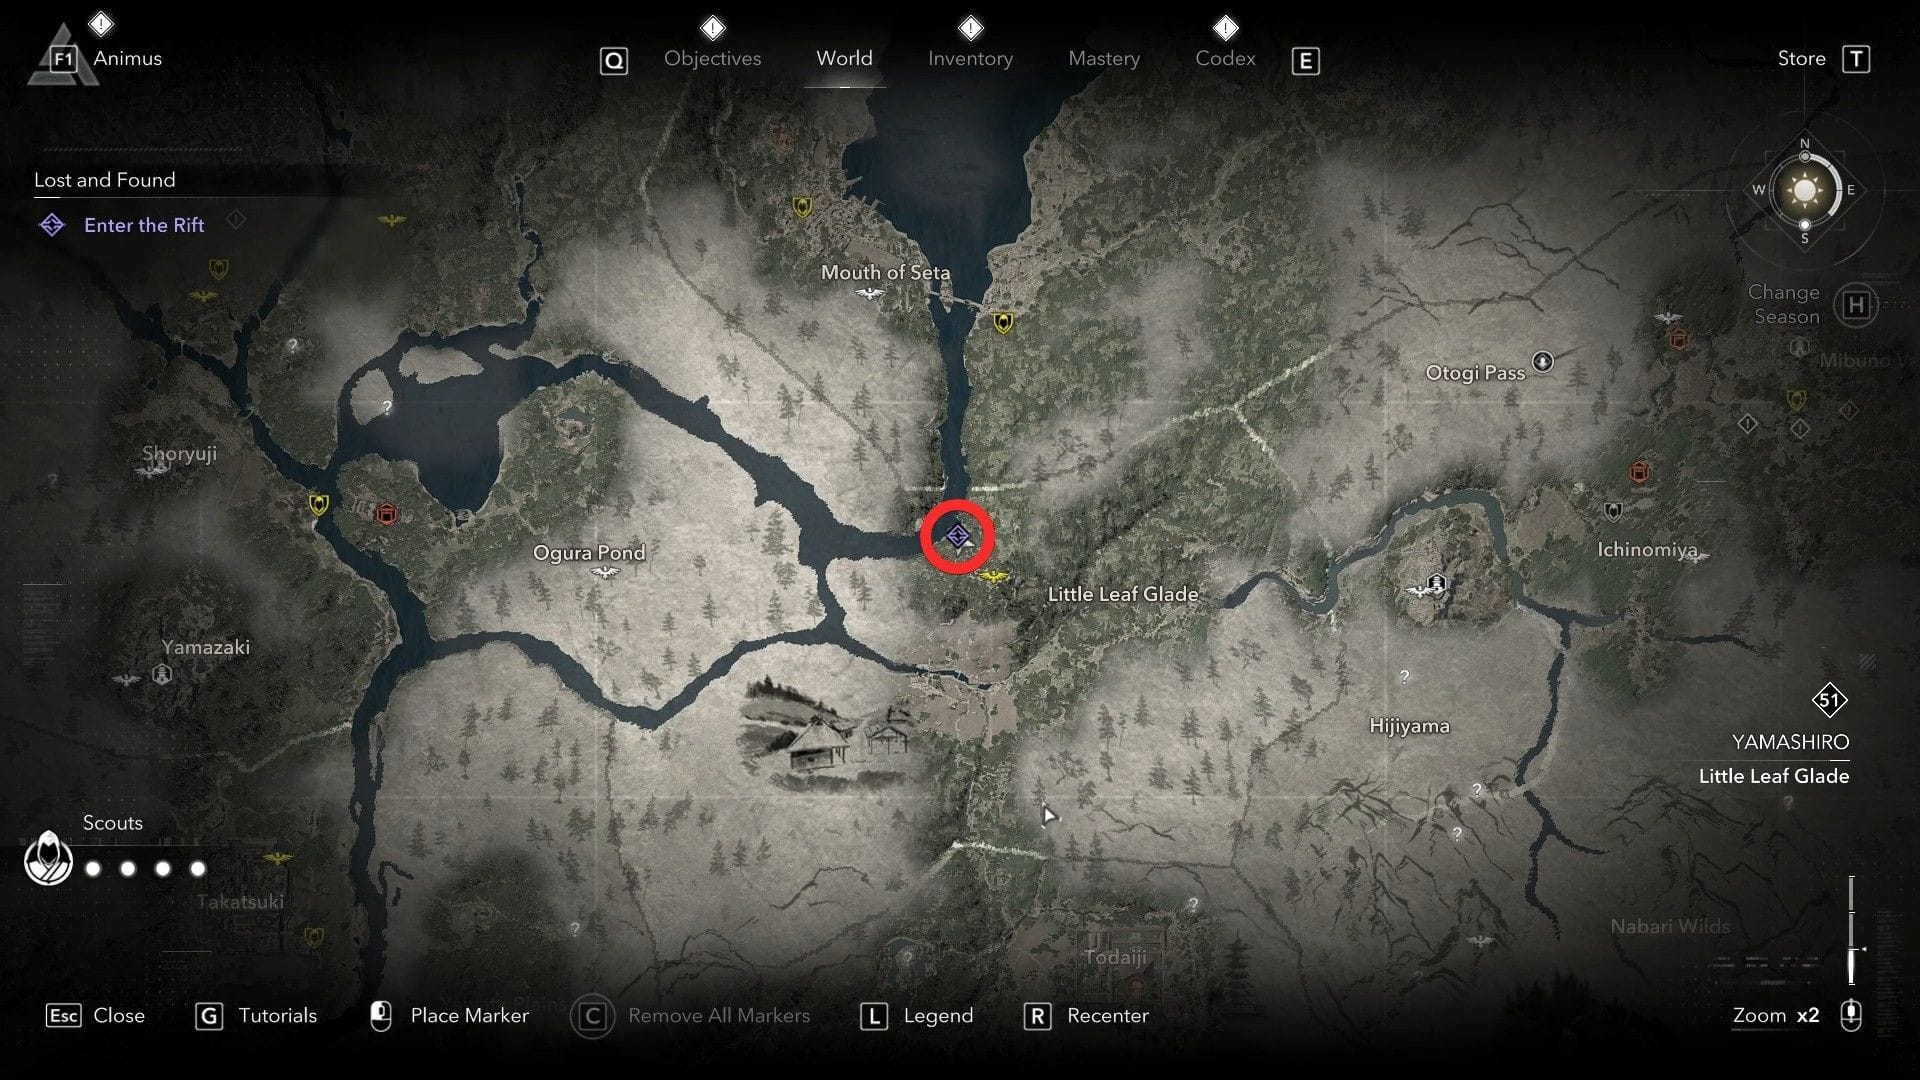
To begin the search, head to the Little Leaf Glade space within the Yamashiro area.

Then, navigate to the northwest of the Deserted Outpost quick journey level to seek out the newly opened rift’s entrance. Interact with the glitch and select the choice “Leap” to start out the Lost and Found quest.
Also learn: 7 errors you must keep away from in Assassin’s Creed Shadows
Lost and Found quest in Assassin’s Creed Shadows: Walkthrough
Navigate in the direction of the portal
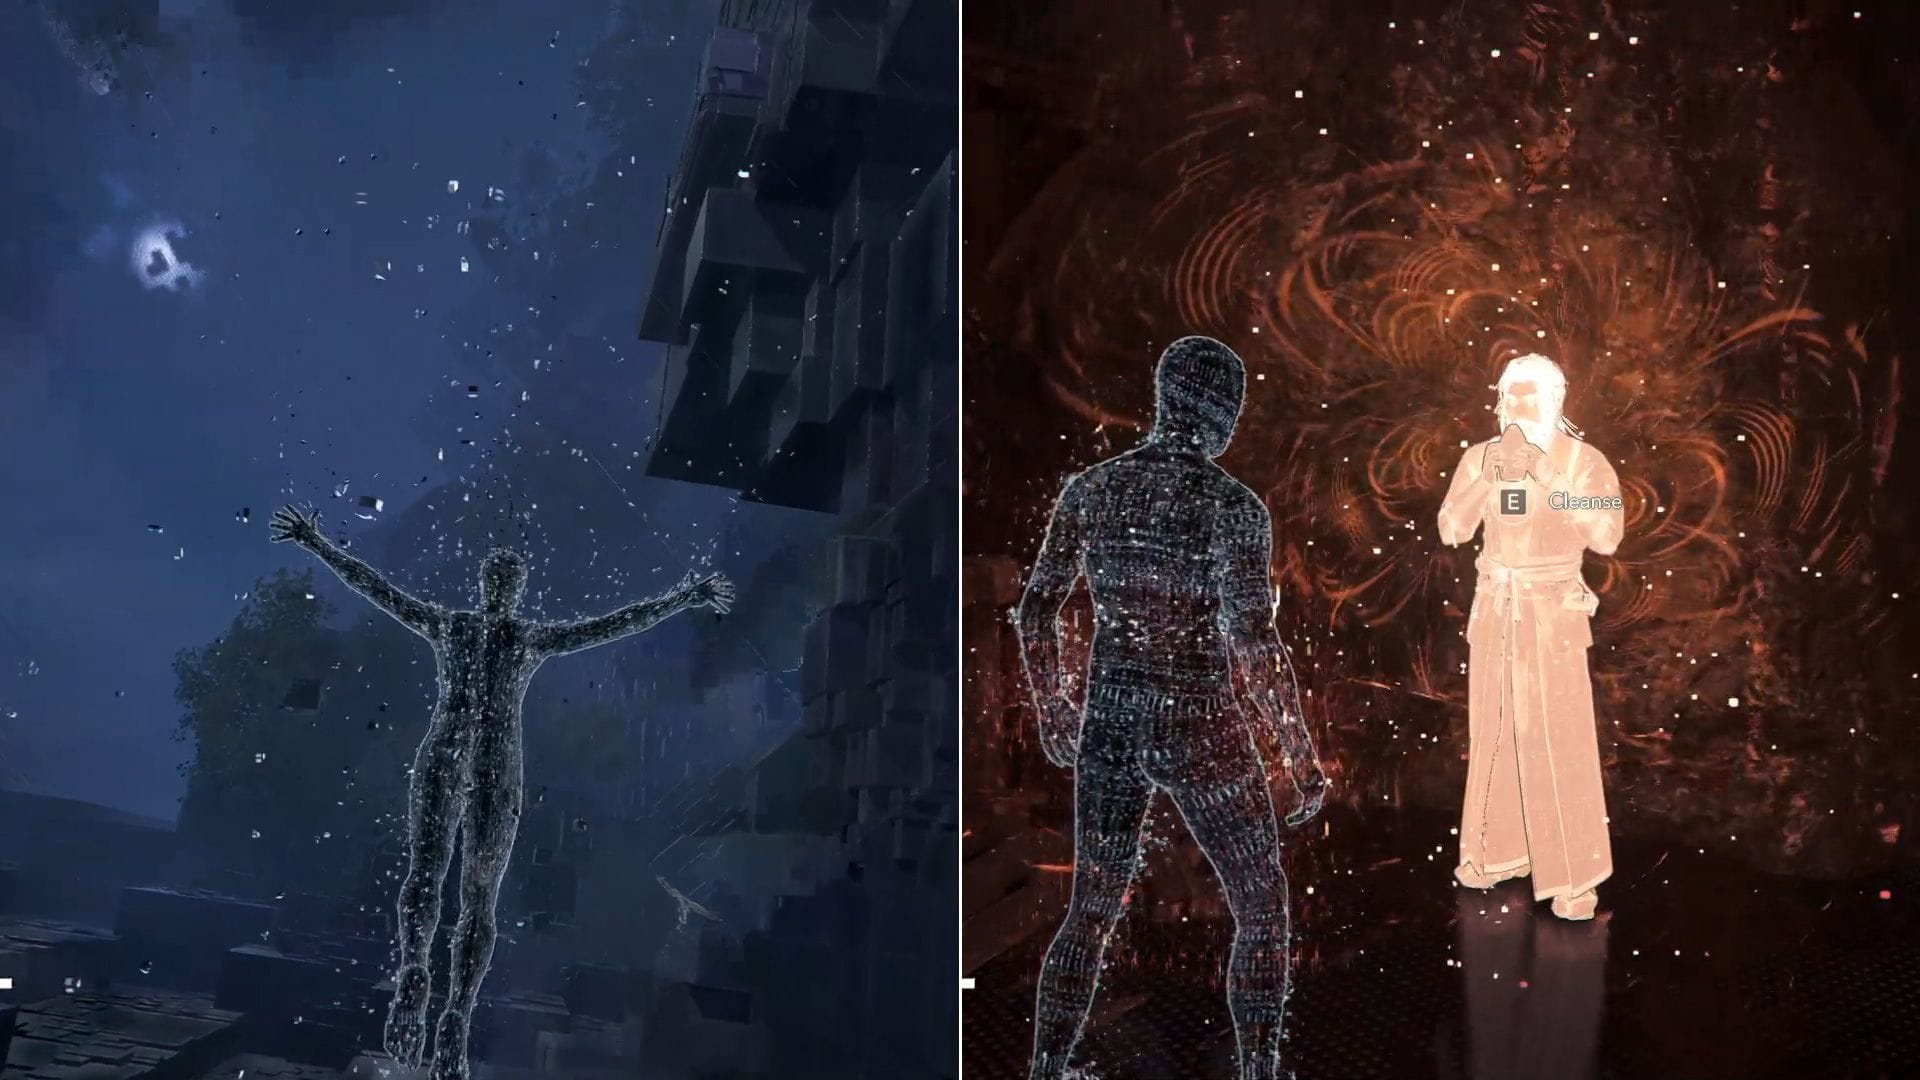
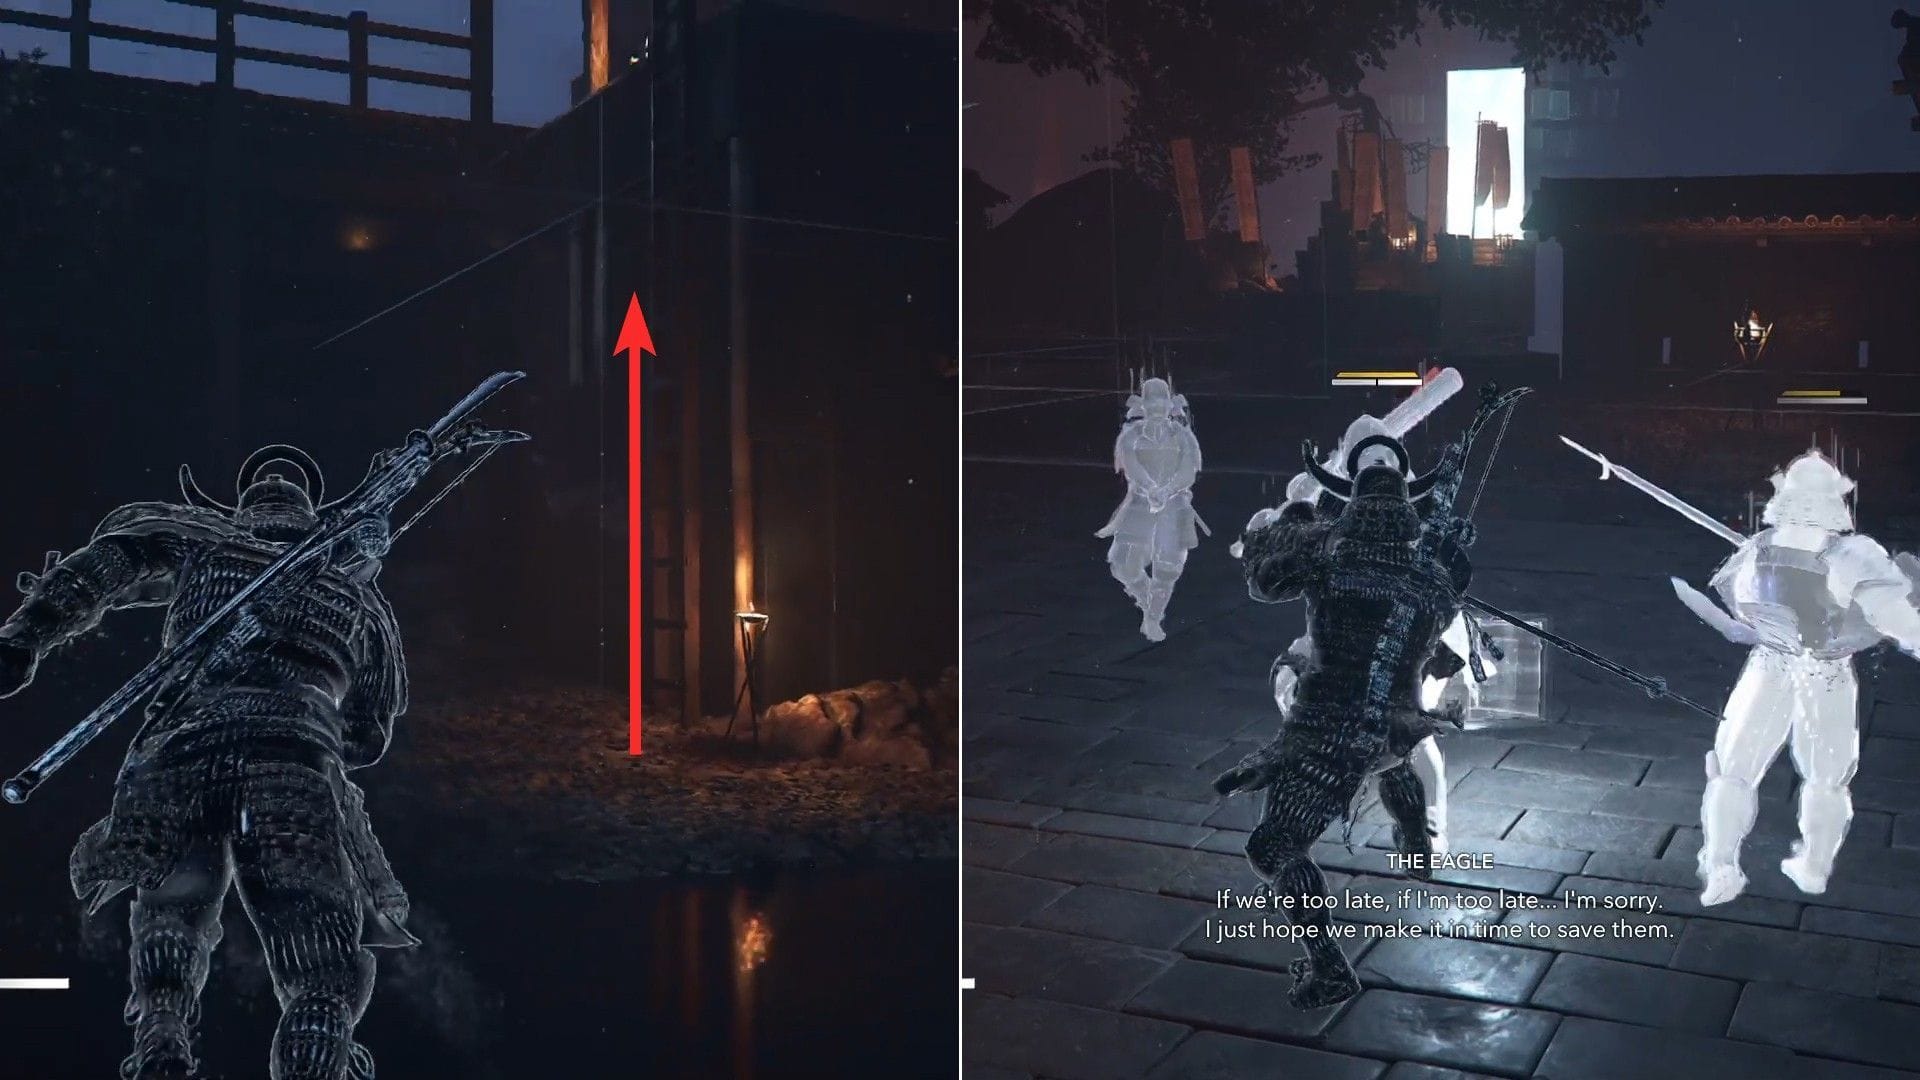
When the search begins, proceed ahead to the sting of the damaged bridge and leap down to carry out a Leap of Faith. Continue via the pathway to seek out an individual. Press and maintain the “Cleanse” choice to show into Naoe.
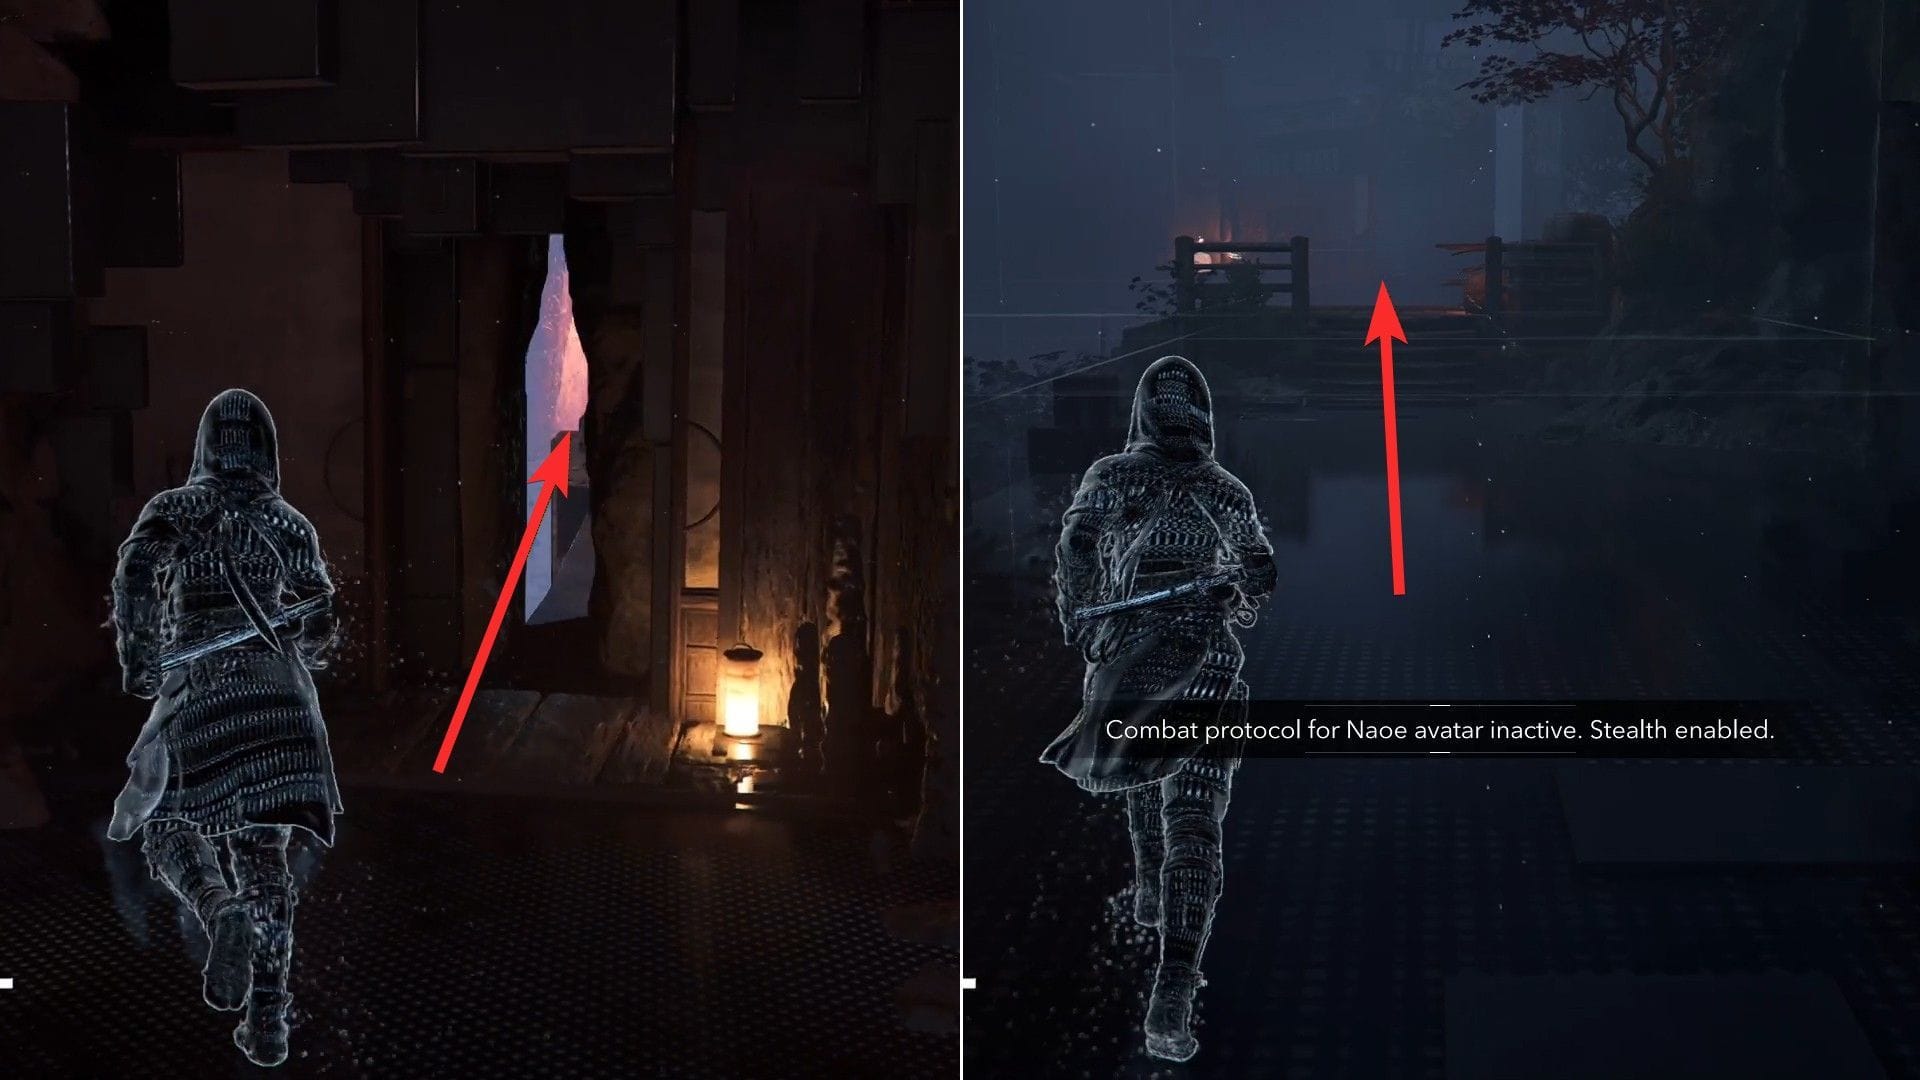
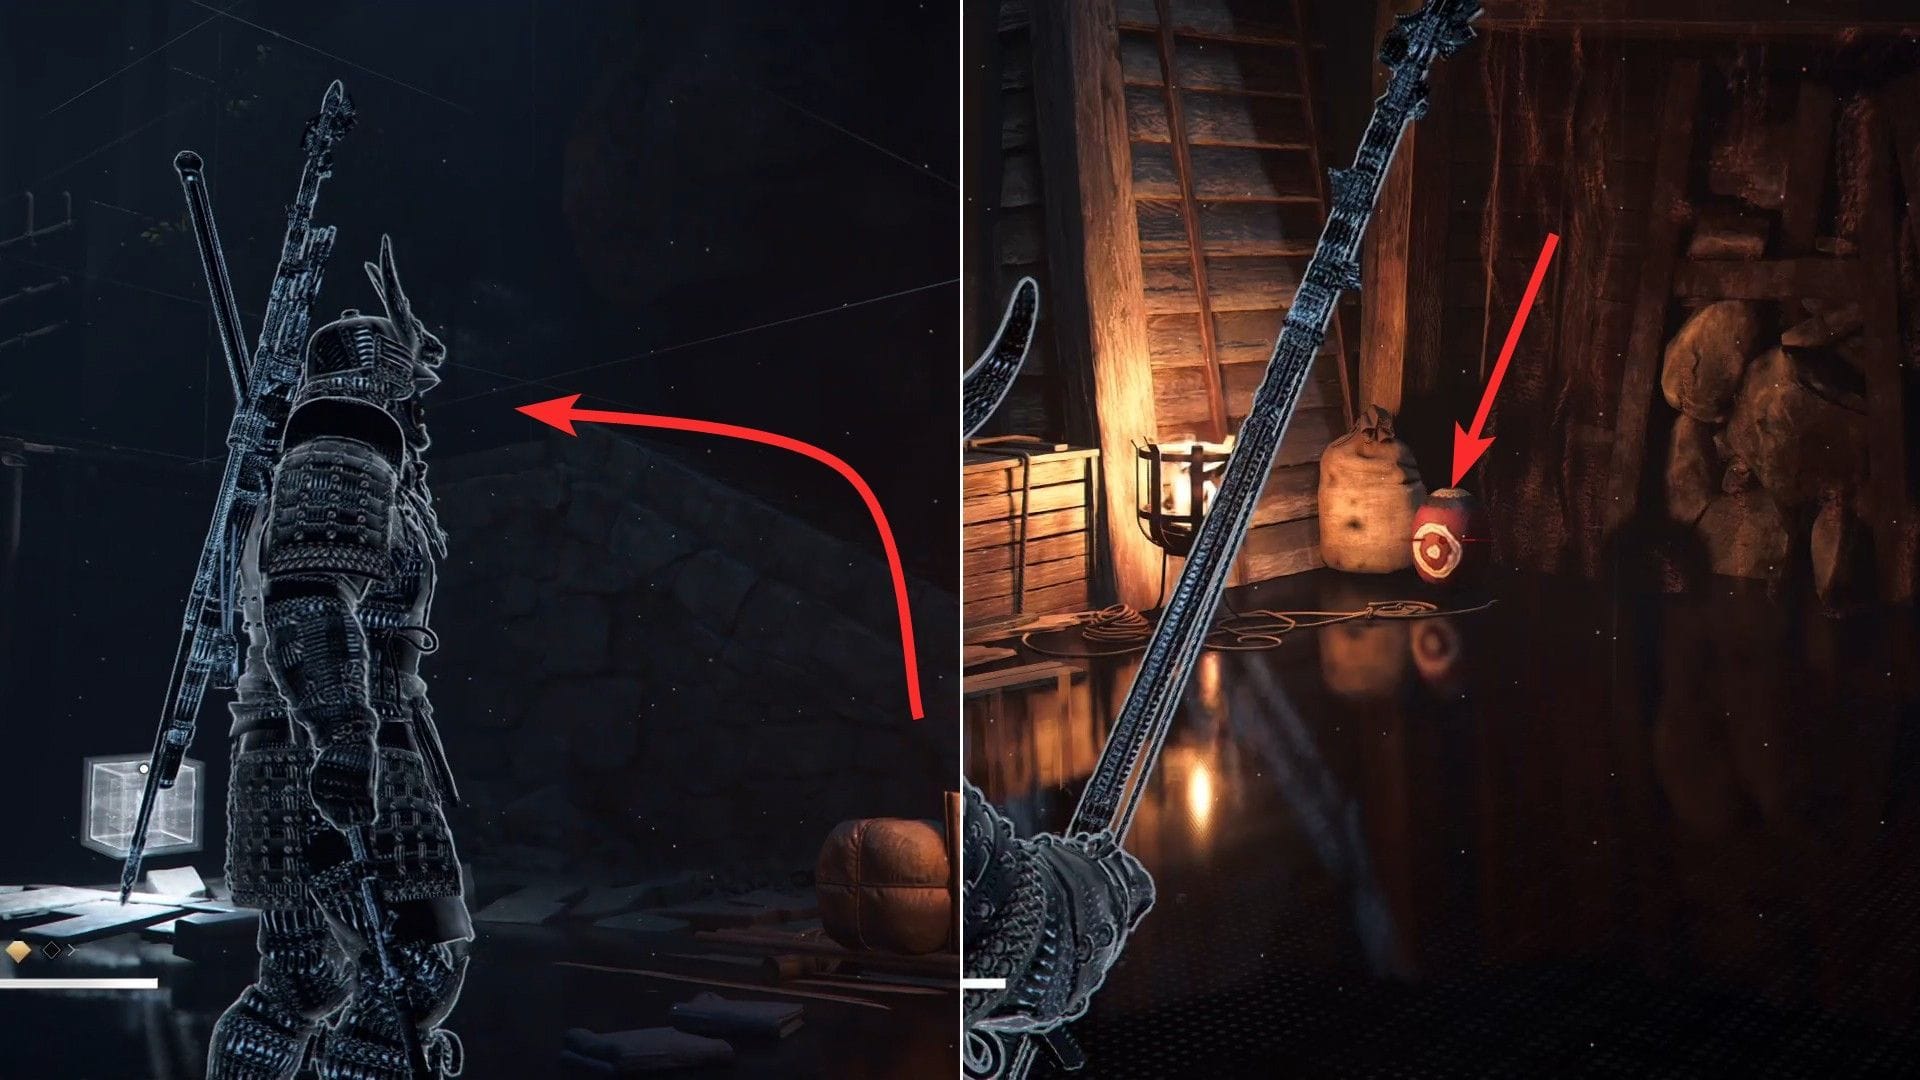
Next, squeeze via the hole within the wall, transfer ahead, and attain the rooftop close by.
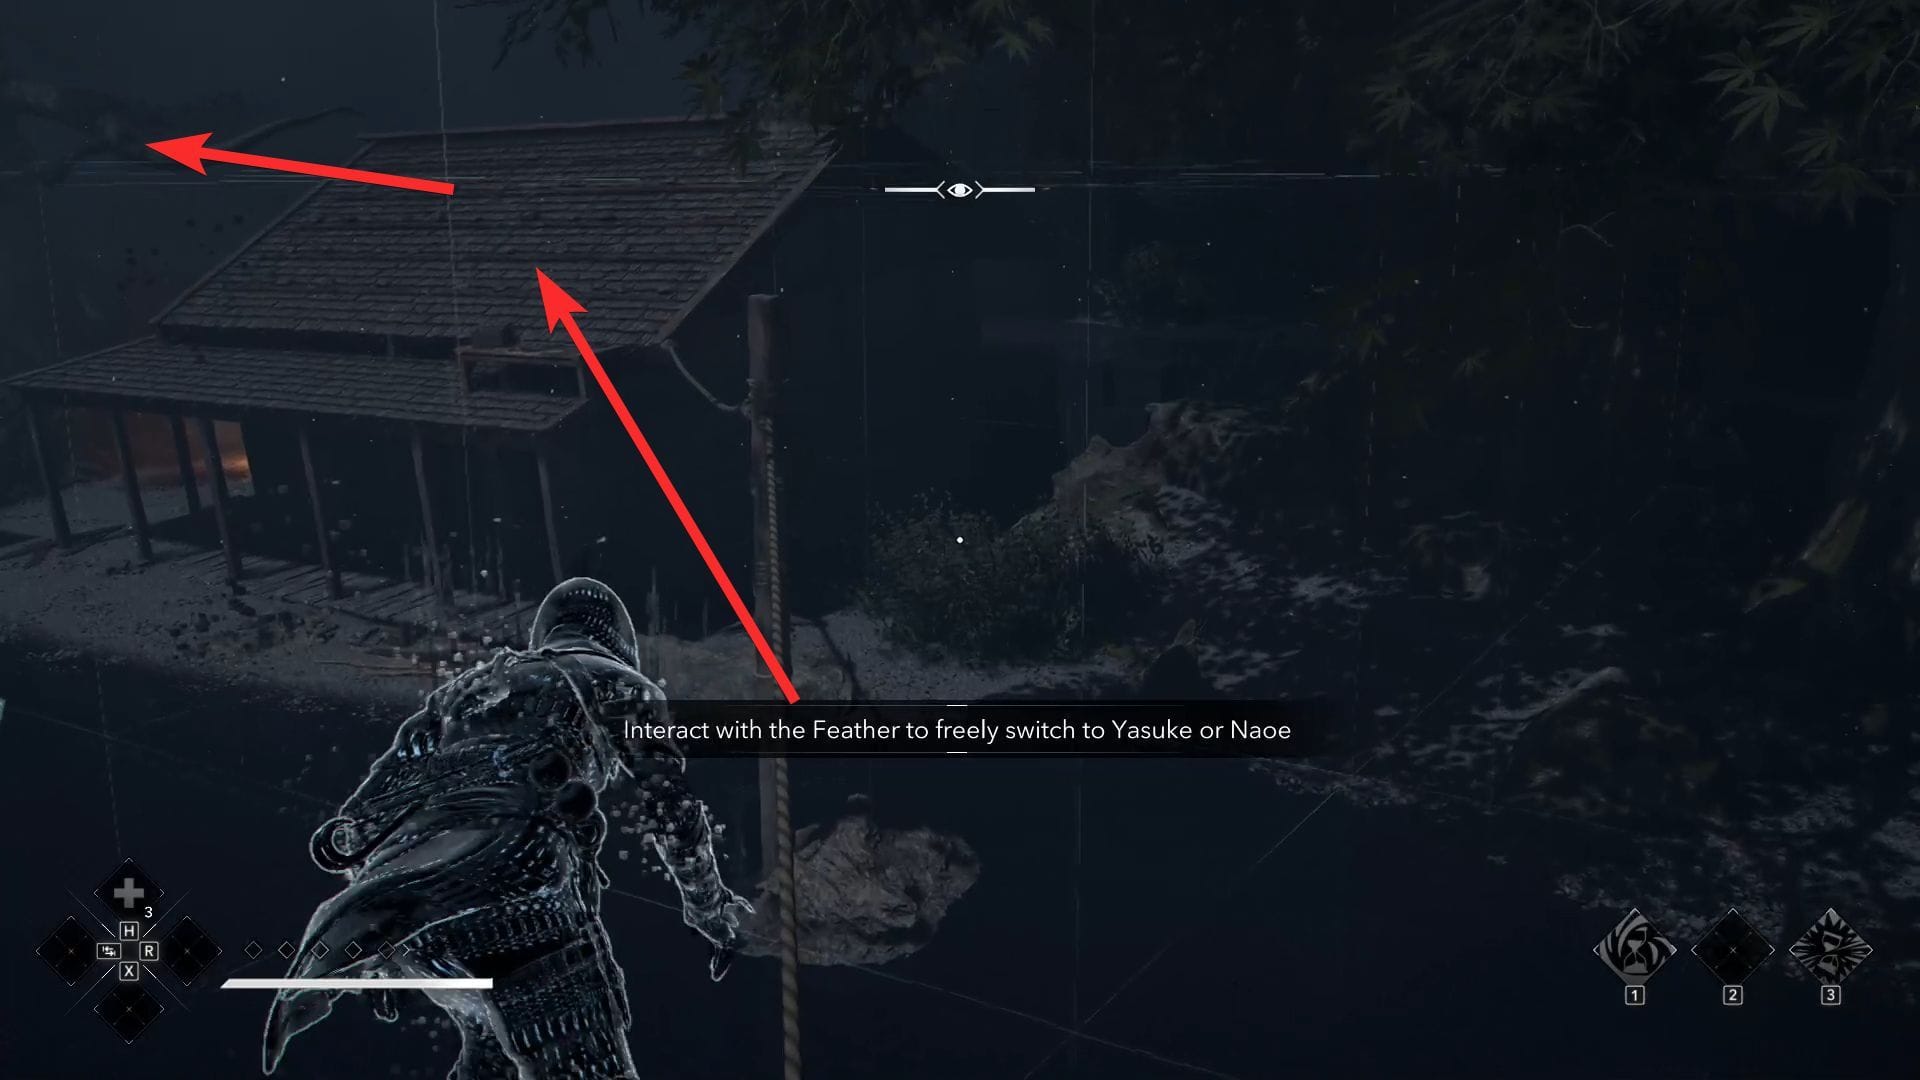
From the rooftop, use the connecting ropes to succeed in the following roof, the place you’ll find tree branches to proceed effectively.
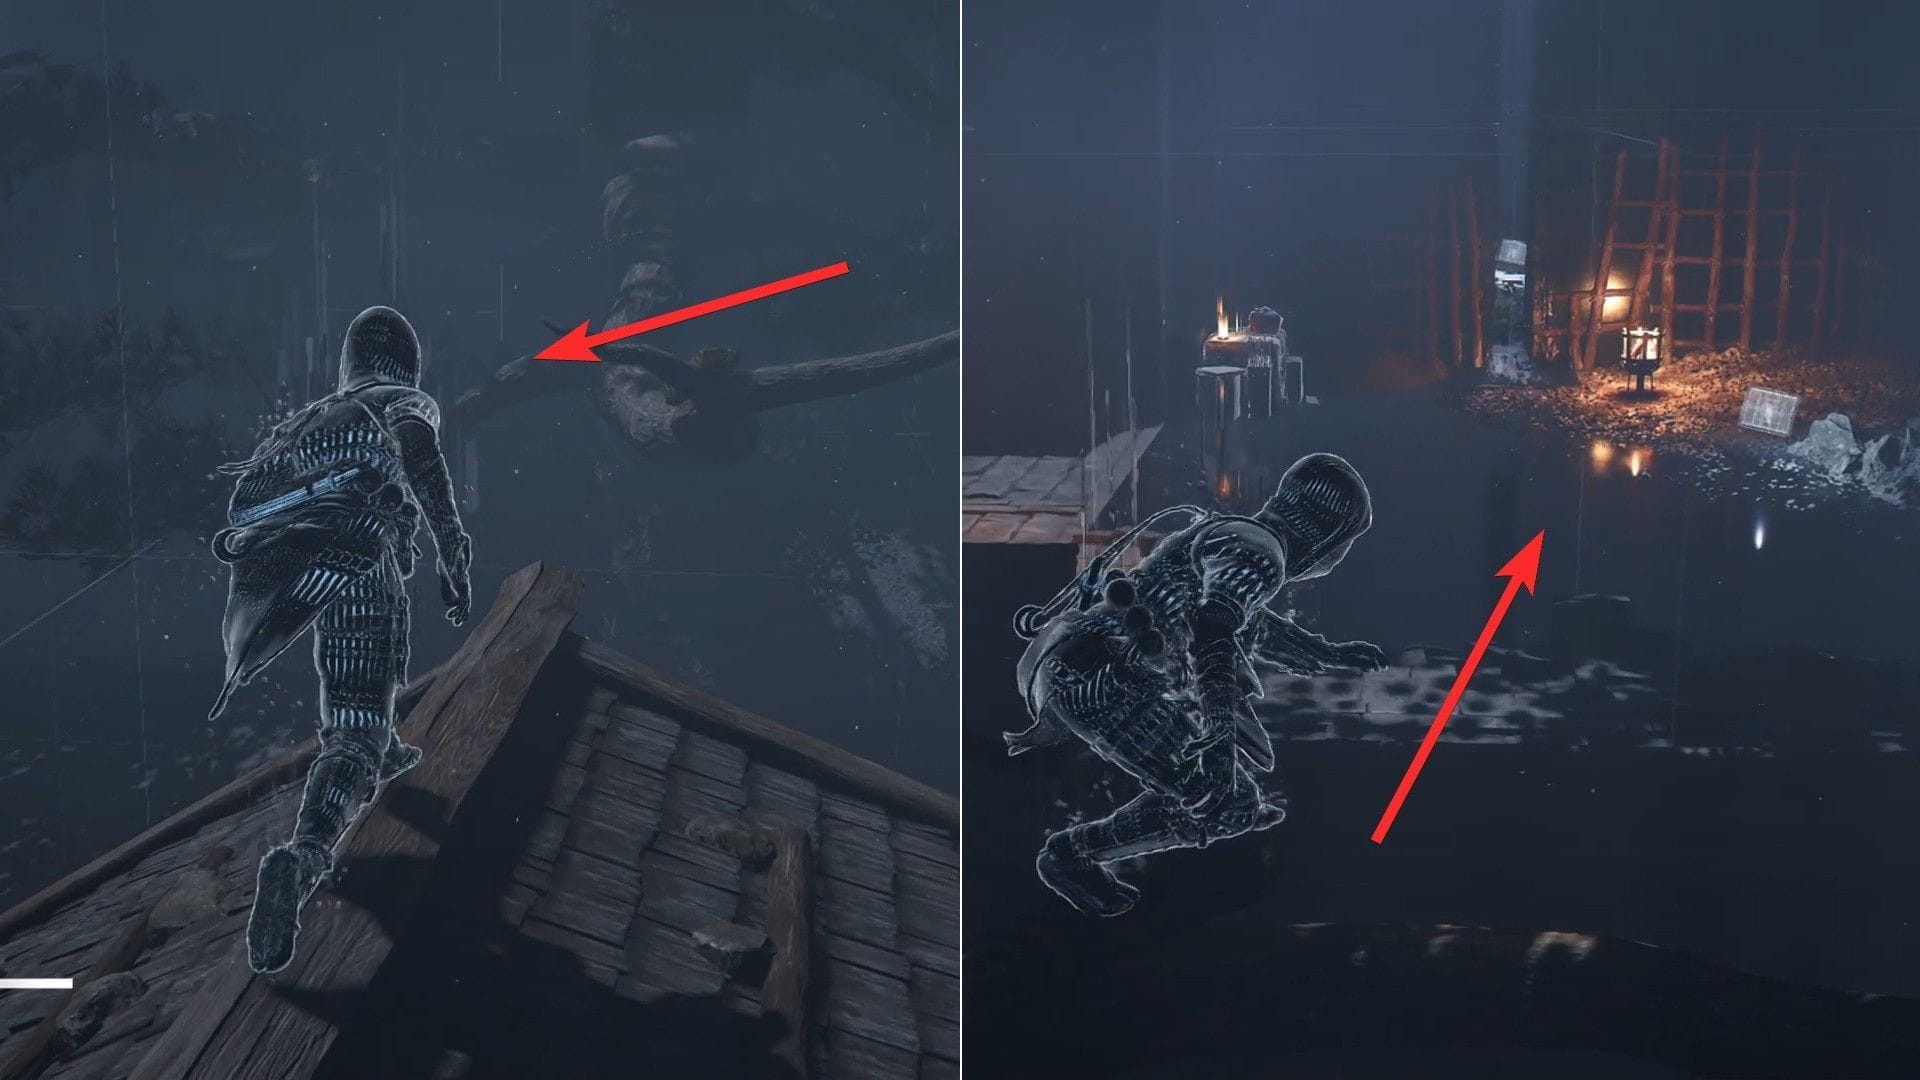
Then, proceed ahead utilizing the branches and leap right down to the following space. You can even refill the provides for each Yasuke and Naoe there.
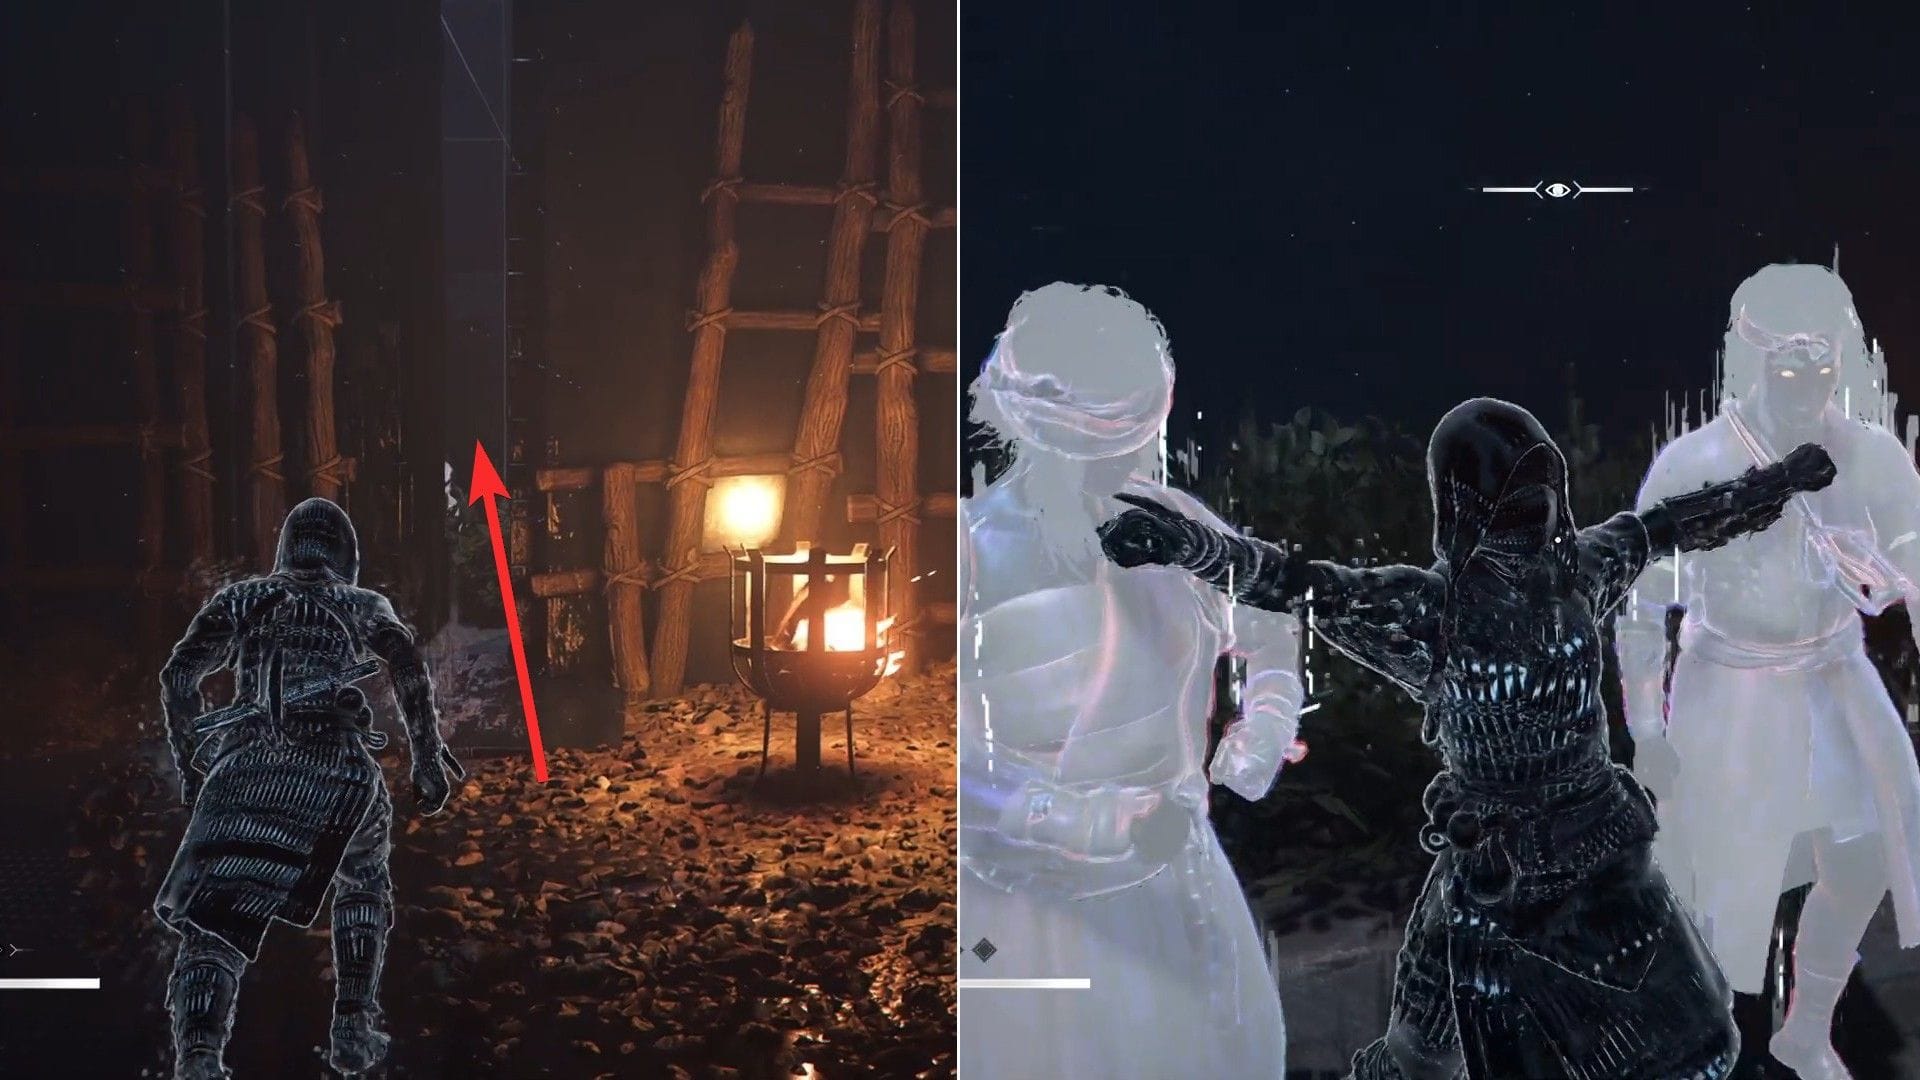
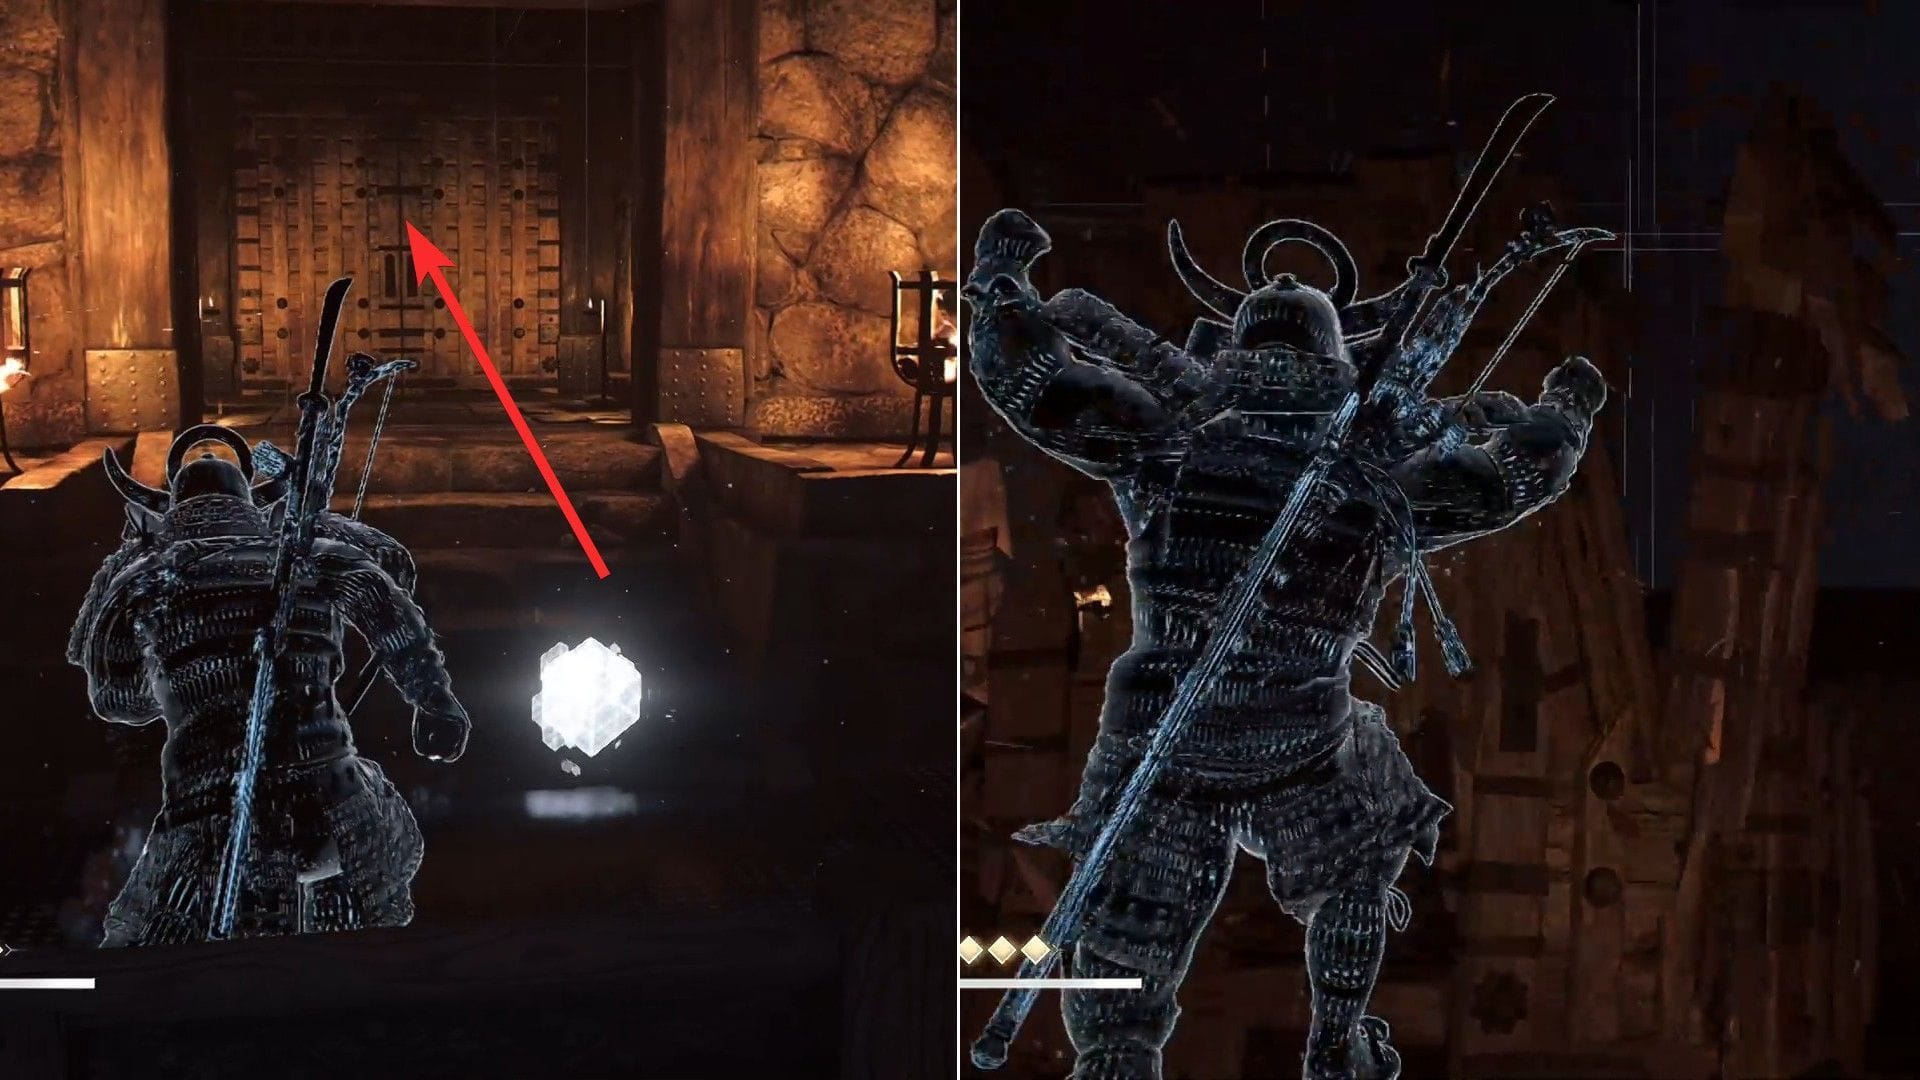
Afterwards, hold Naoe’s kind and squeeze via the hole and take out the enemies there from behind. There’s additionally a dice there, which you’ll be able to work together with and take Yasuke’s kind to defeat the enemies.
Next, go upstairs, and you will see that a blocked door. Detonate the explosive close by through the use of Naoe’s throwables or Yasuke’s ranged weapons. Proceed ahead and once more, select “Cleanse“ by interacting with Oda Nobunaga.
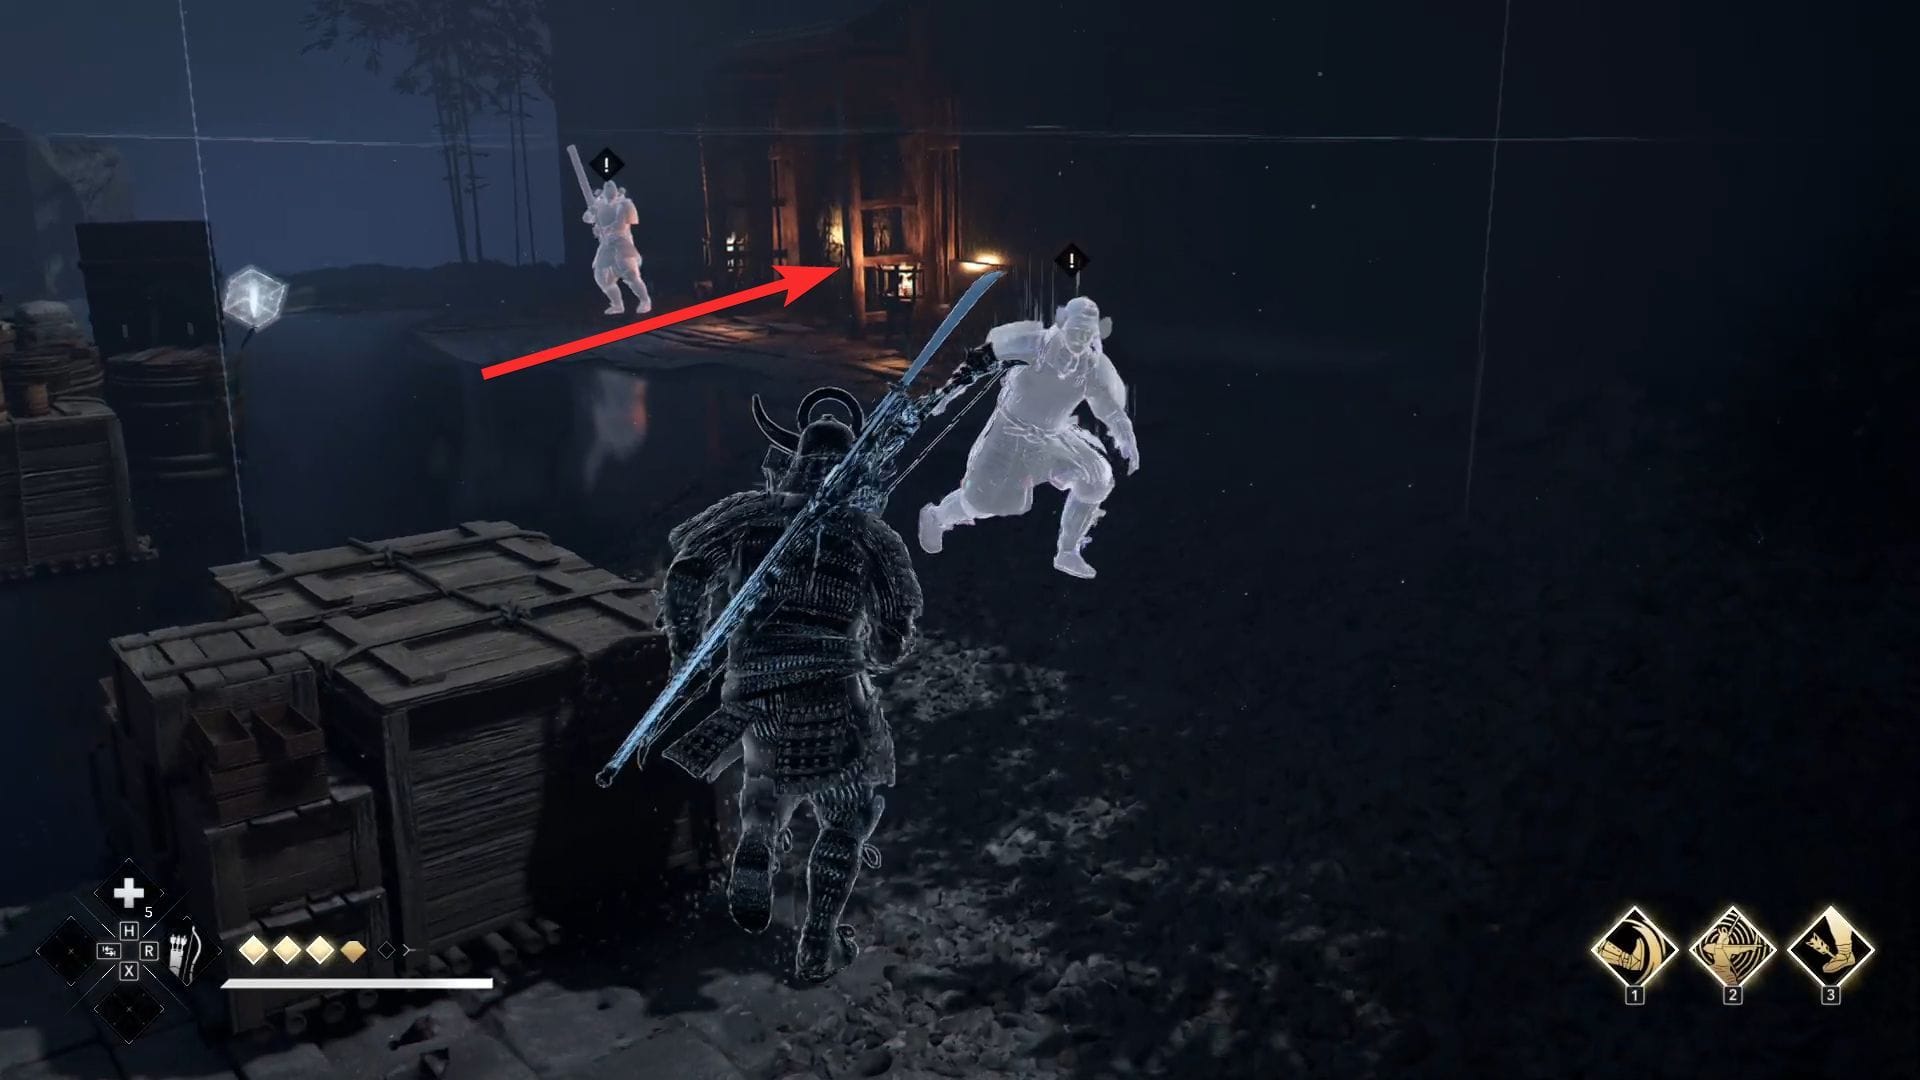
Fall to the bottom in entrance of you and defeat the enemies utilizing Yasuke. Next, take Naoe’s kind and undergo the hole within the wall in that space.

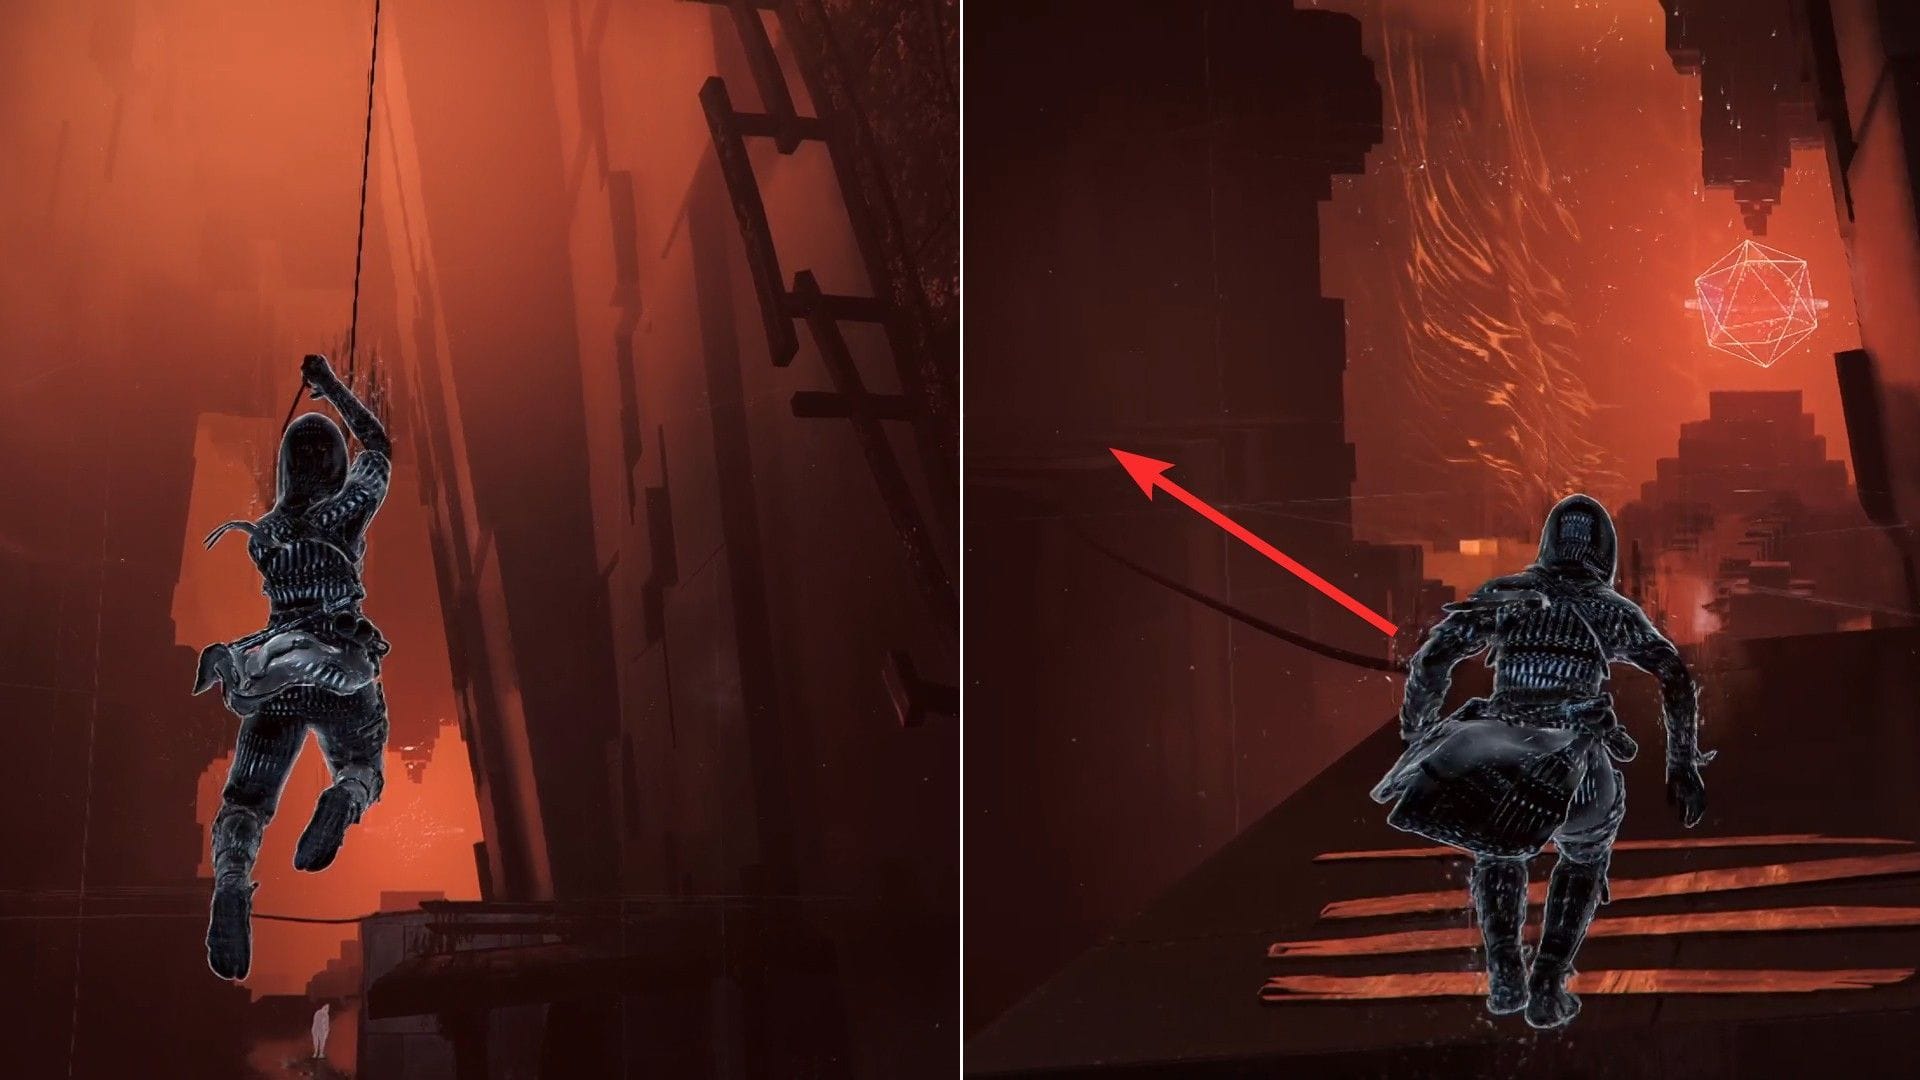
On the opposite facet, proceed ahead to the sting, and use Naoe’s grappling hook to journey to a different location with the assistance of the Eagle.
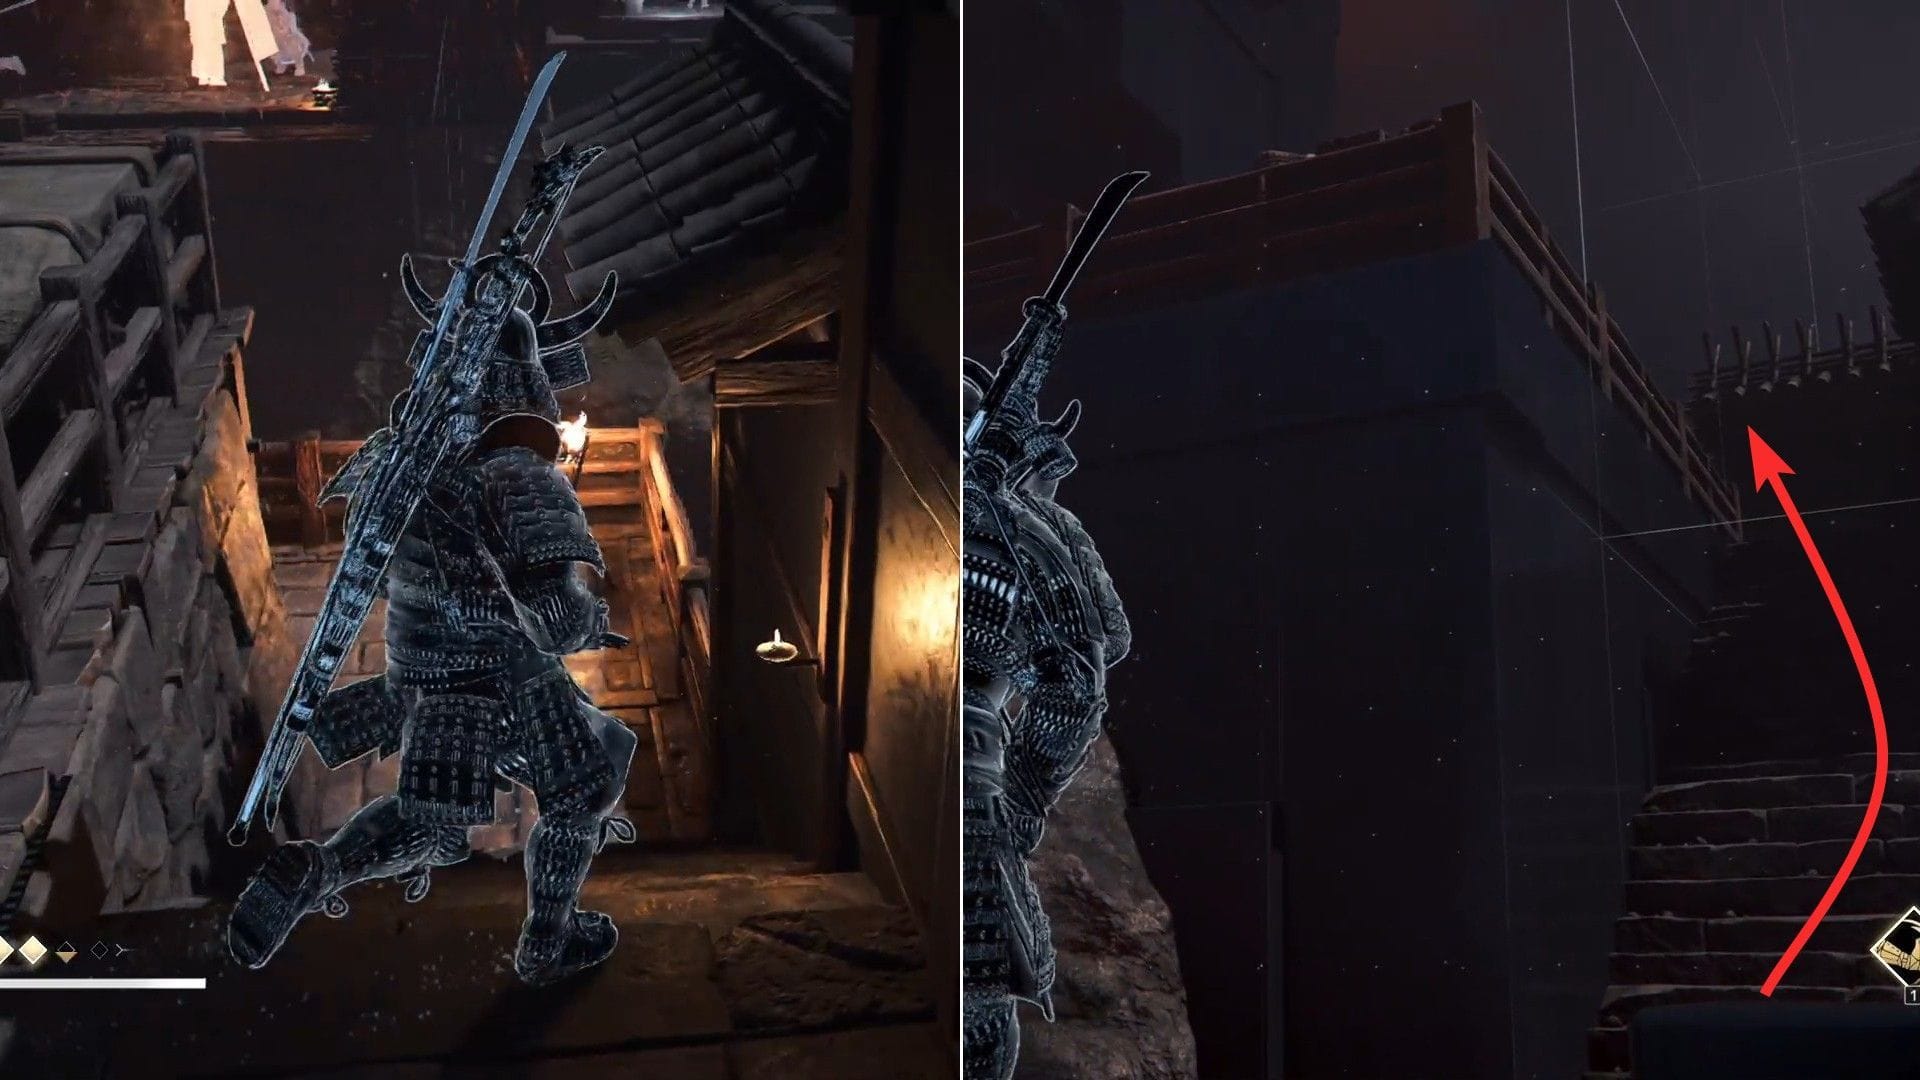
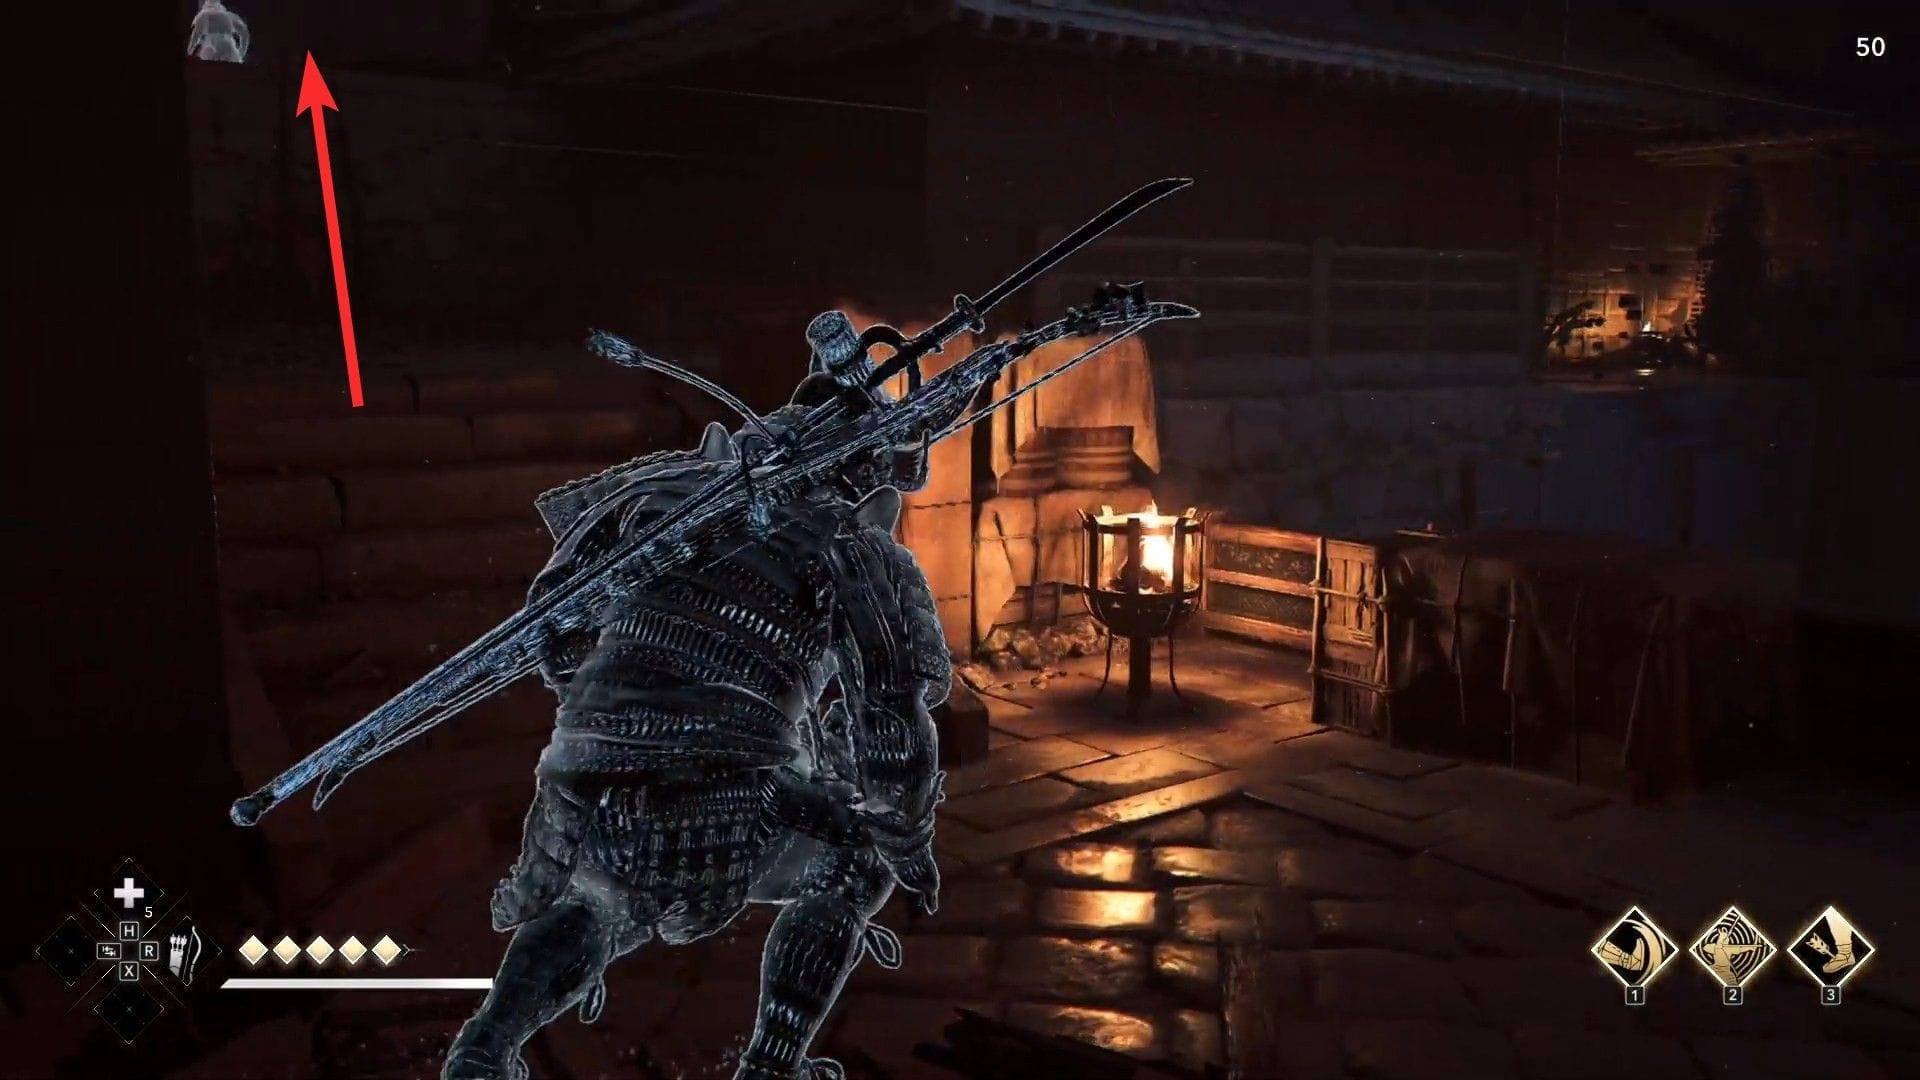
Following that, transfer ahead, take Yasuke’s kind, and head downstairs. Kill all of the enemies there and go to the opposite facet to discover one other staircase going to the higher platform.
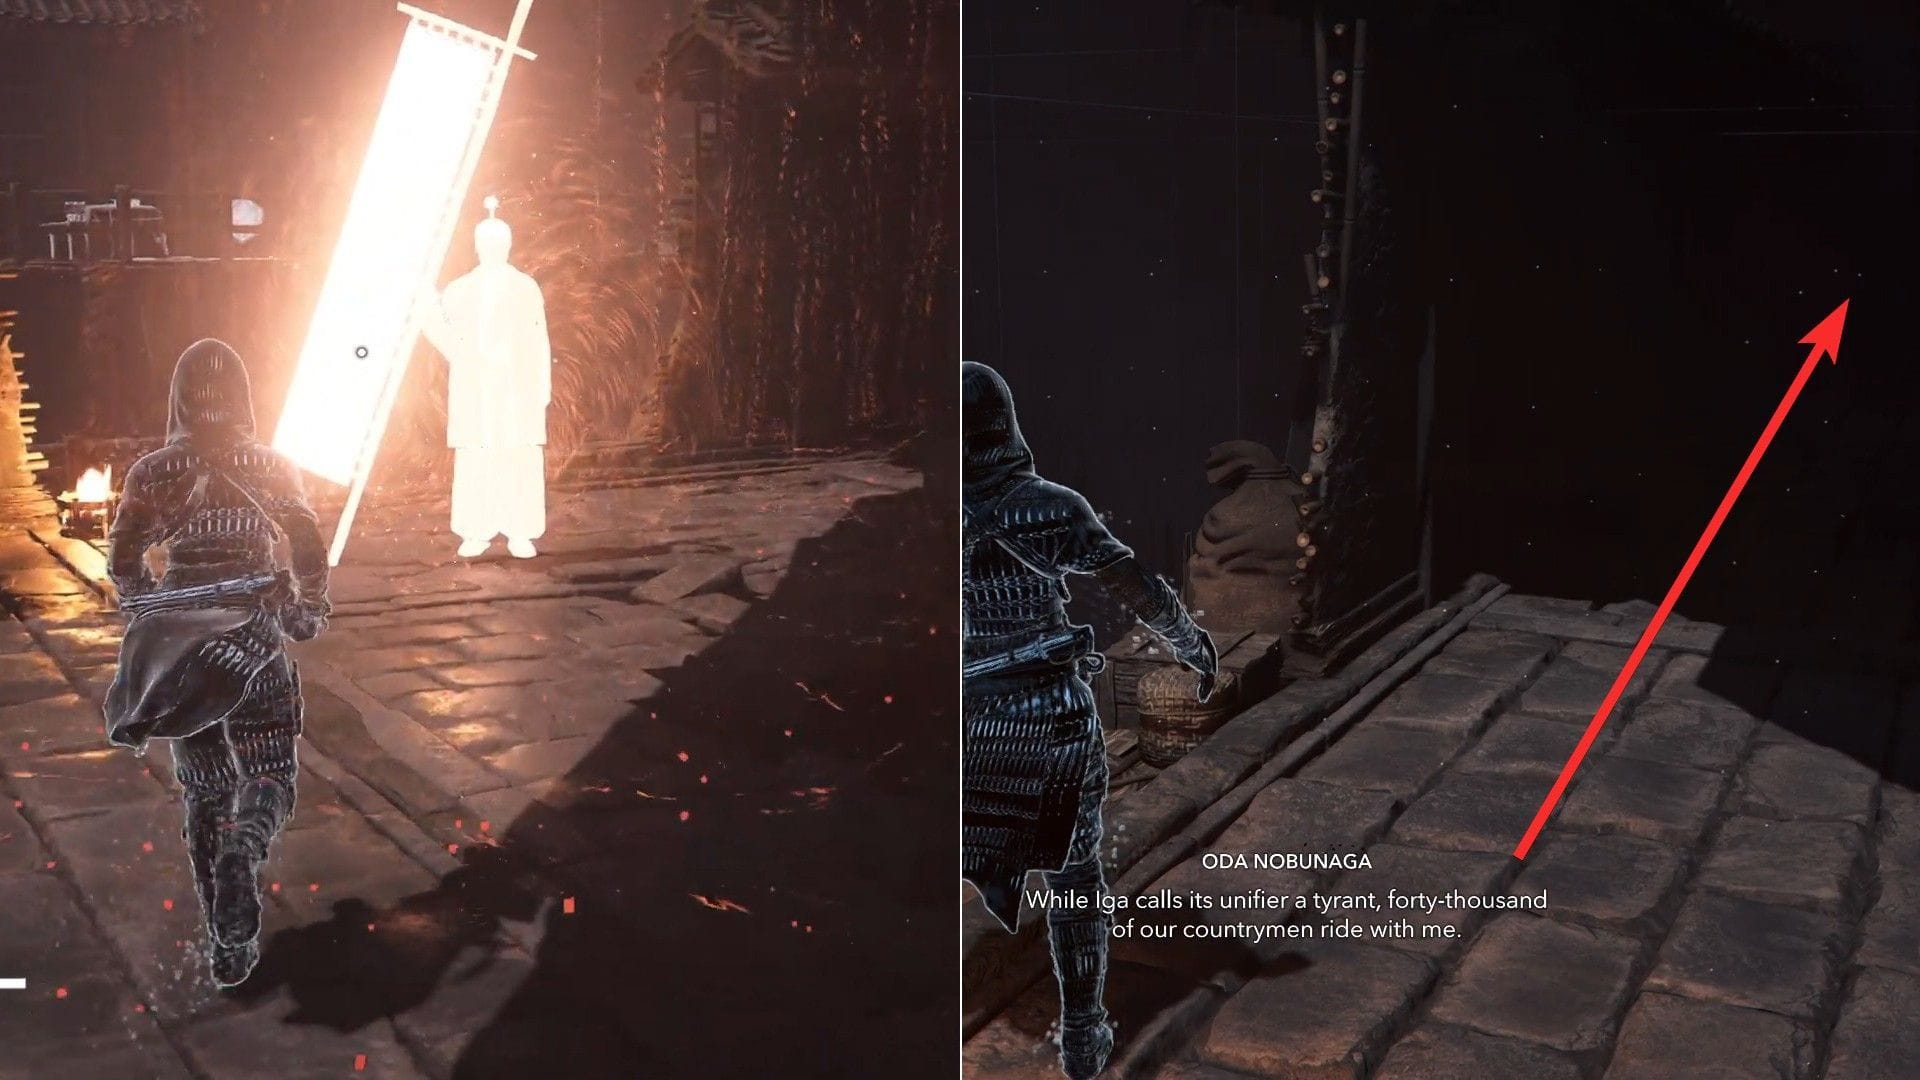
Go upstairs and work together with Oda Nobunaga to “Cleanse.” From there, proceed proper to discover a ladder.
Climb as much as discover one other dice to vary kind. Turn into Yasuke and dash on the blocked door close by to interrupt it open.
Next, go left, climb the small wood ladder to succeed in the higher platform when the patrolling enemy strikes within the different route. However, do not method the enemies in entrance head-on.
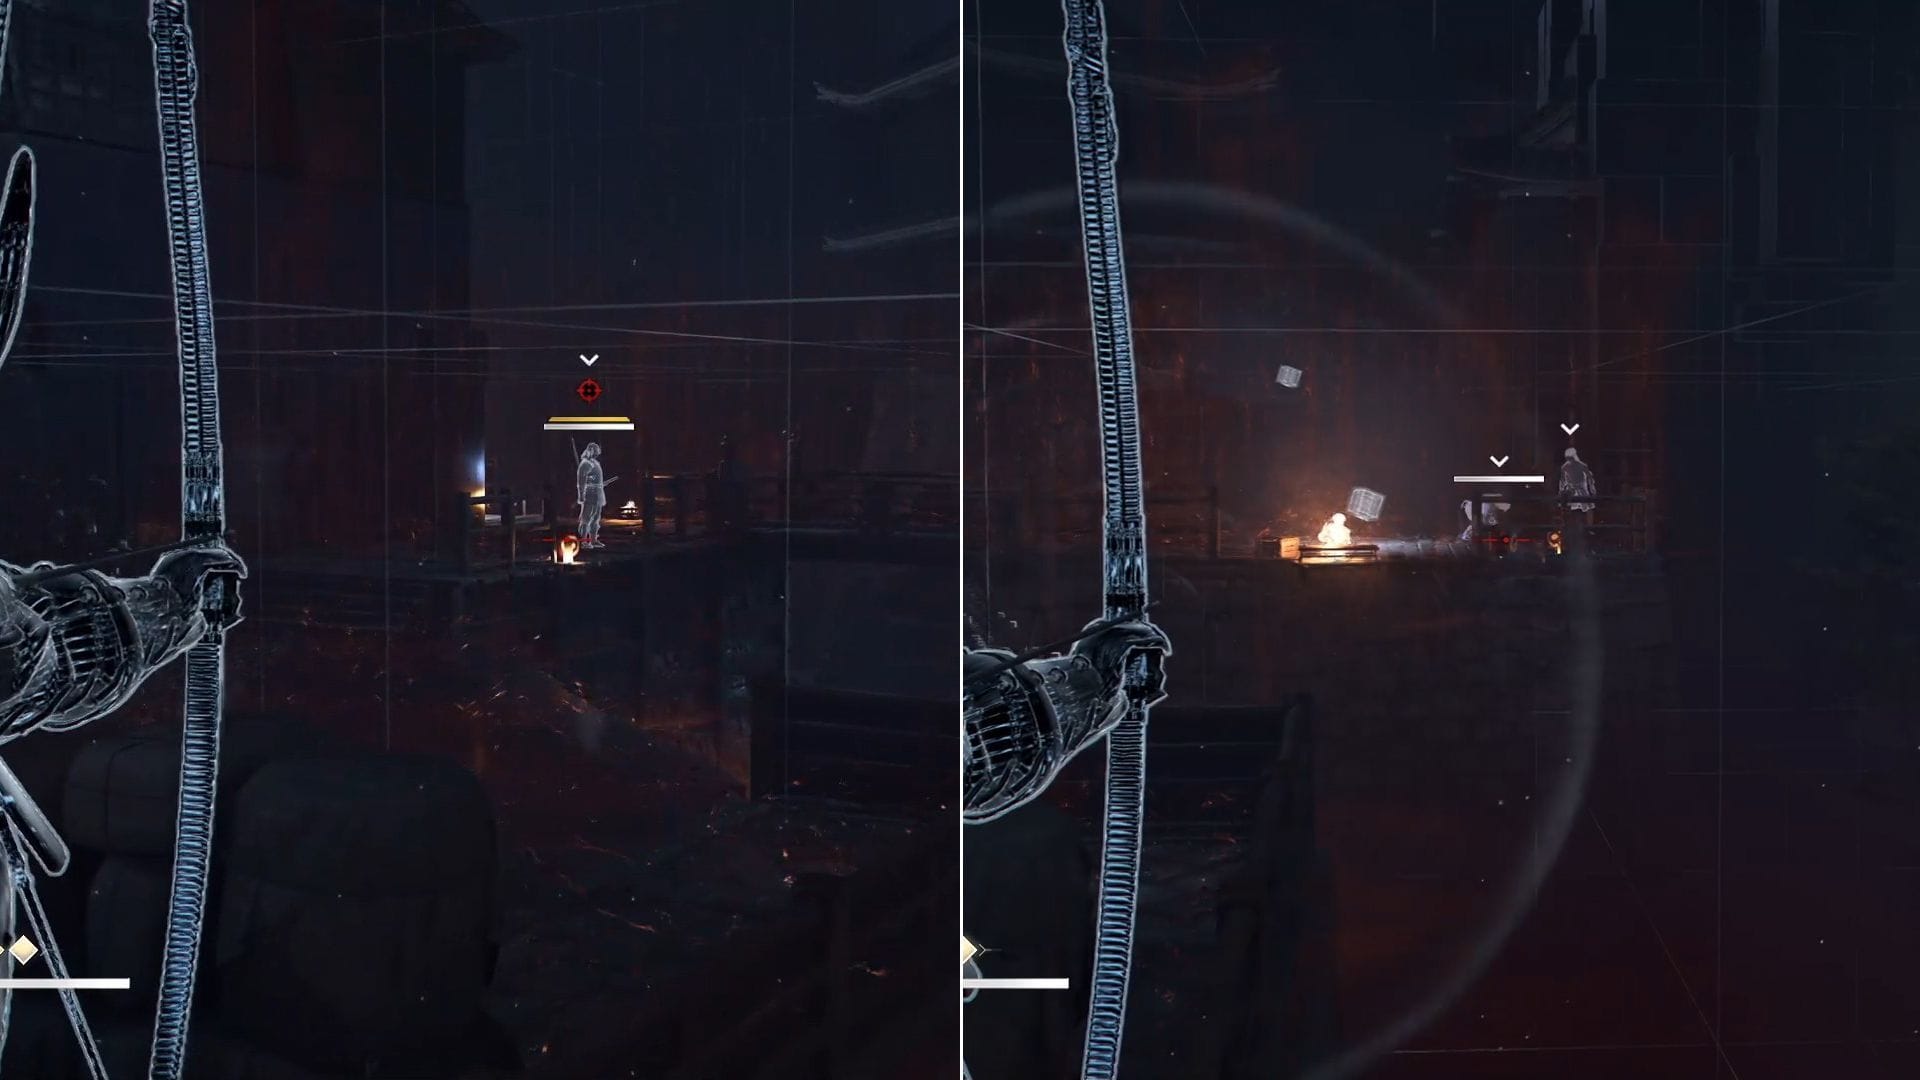
Instead, use Naoe or Yasuke’s ranged assaults to detonate the explosive to kill the foes from a distance.
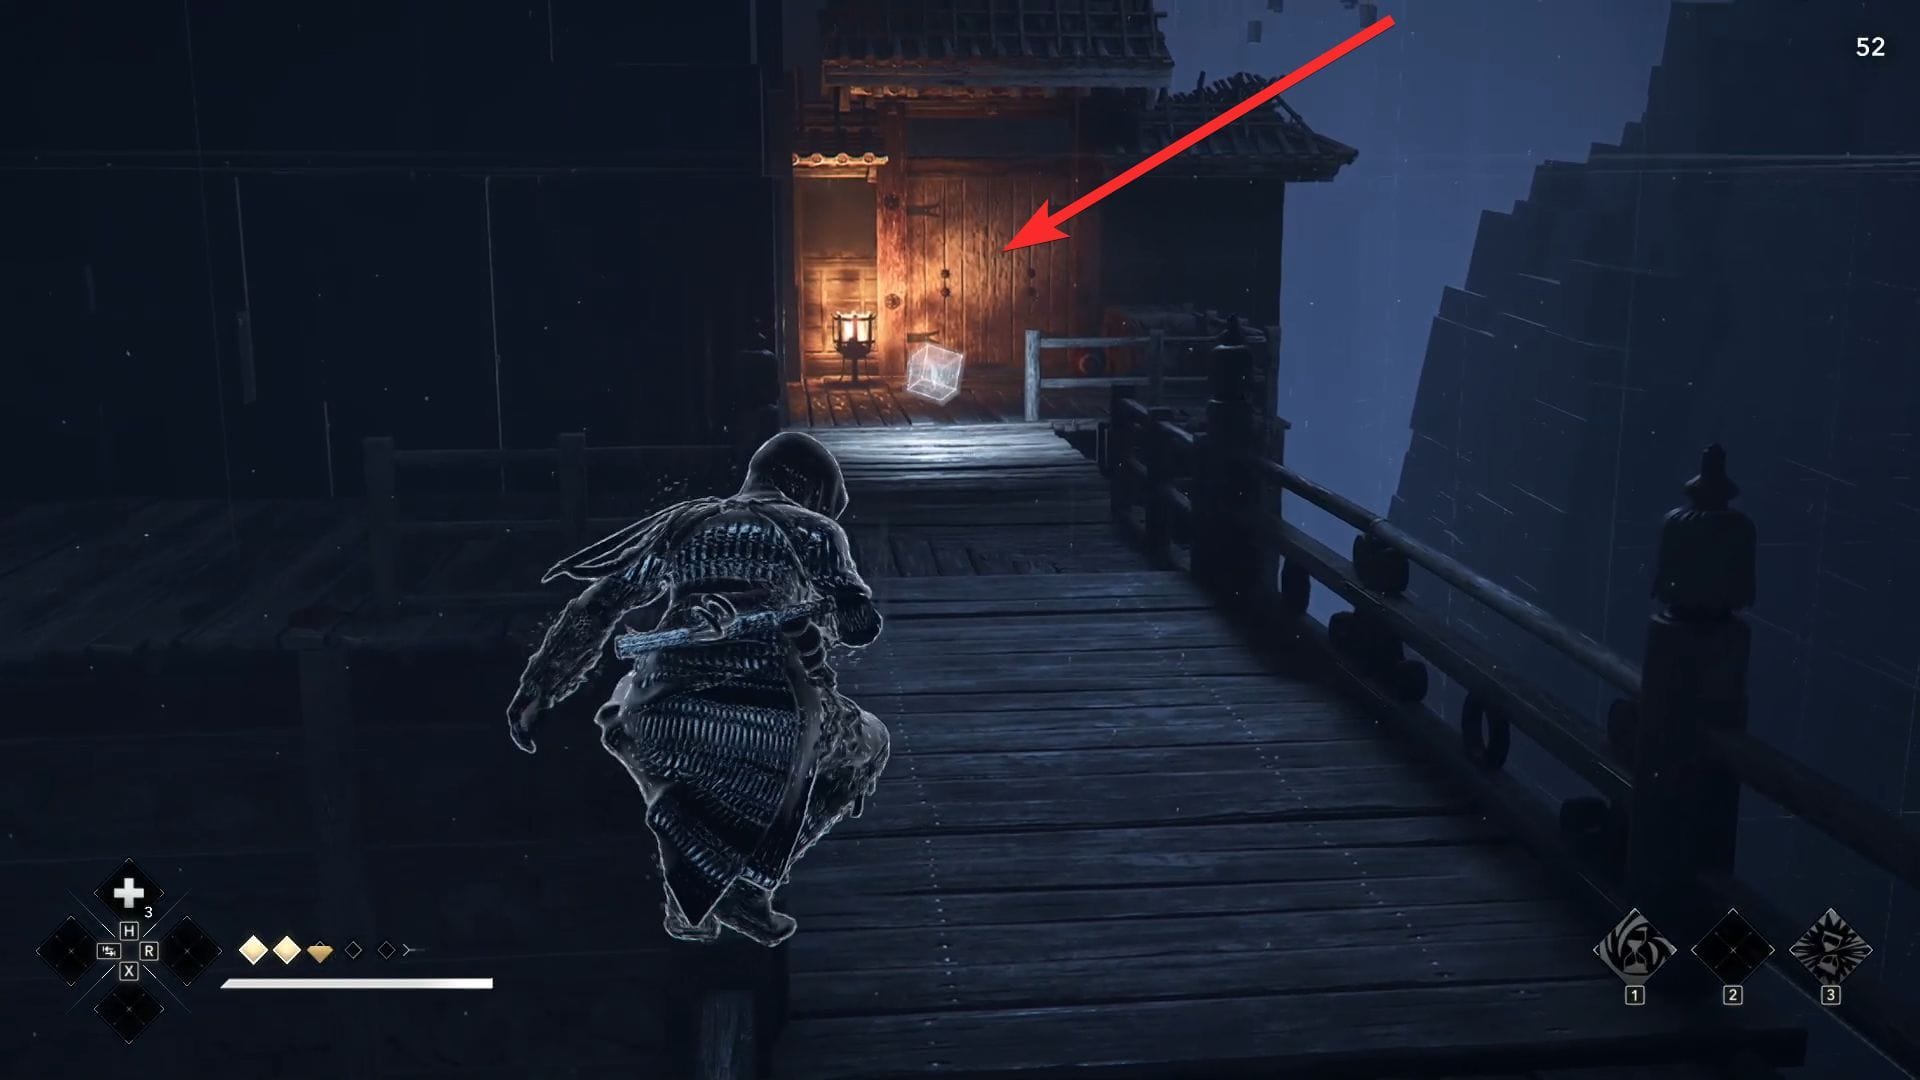
When all of them are useless, proceed ahead and work together with Junjiro to “Cleanse.” Next, take Yasuke’s kind and kill the remainder of the enemies in there. Then, break the wood door by sprinting at it utilizing Yasuke. You can even use the explosive to interrupt the door.
Afterwards, climb the ladder in there to succeed in one other space, the place you could defeat the foes utilizing Yasuke.

When achieved, proceed ahead to the sting and use Naoe’s grappling hook to take assist from the Eagle to maneuver to a different location.
Also learn: How to skip time in Assassin’s Creed Shadows
Sentinel B-Ser.0197 boss battle information
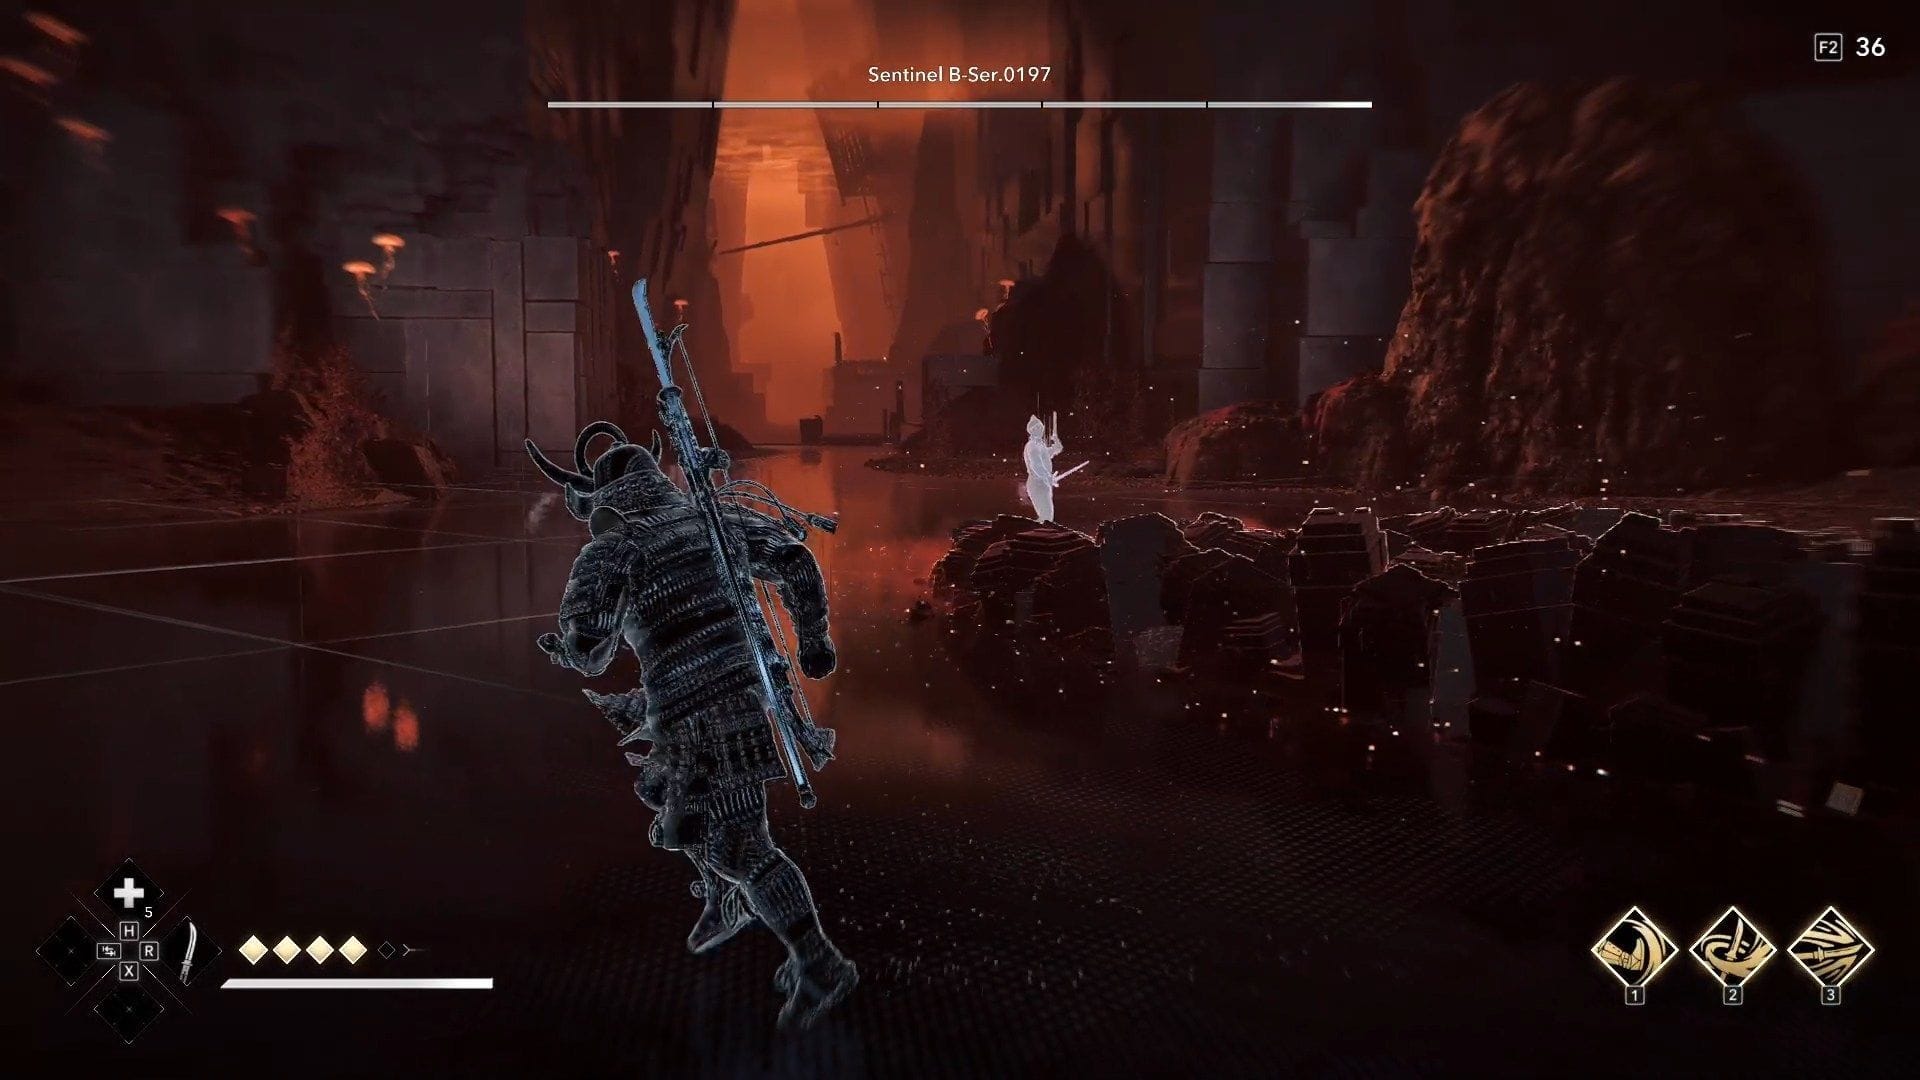
After reaching close to the portal, you’ll be encountered by an enemy referred to as “Sentinel B-Ser.0197.” This boss battle is kind of intriguing, with the opponent boasting a set of sensible new assaults. Firstly, keep away from its ranged floor assault by shortly dodging to the facet.
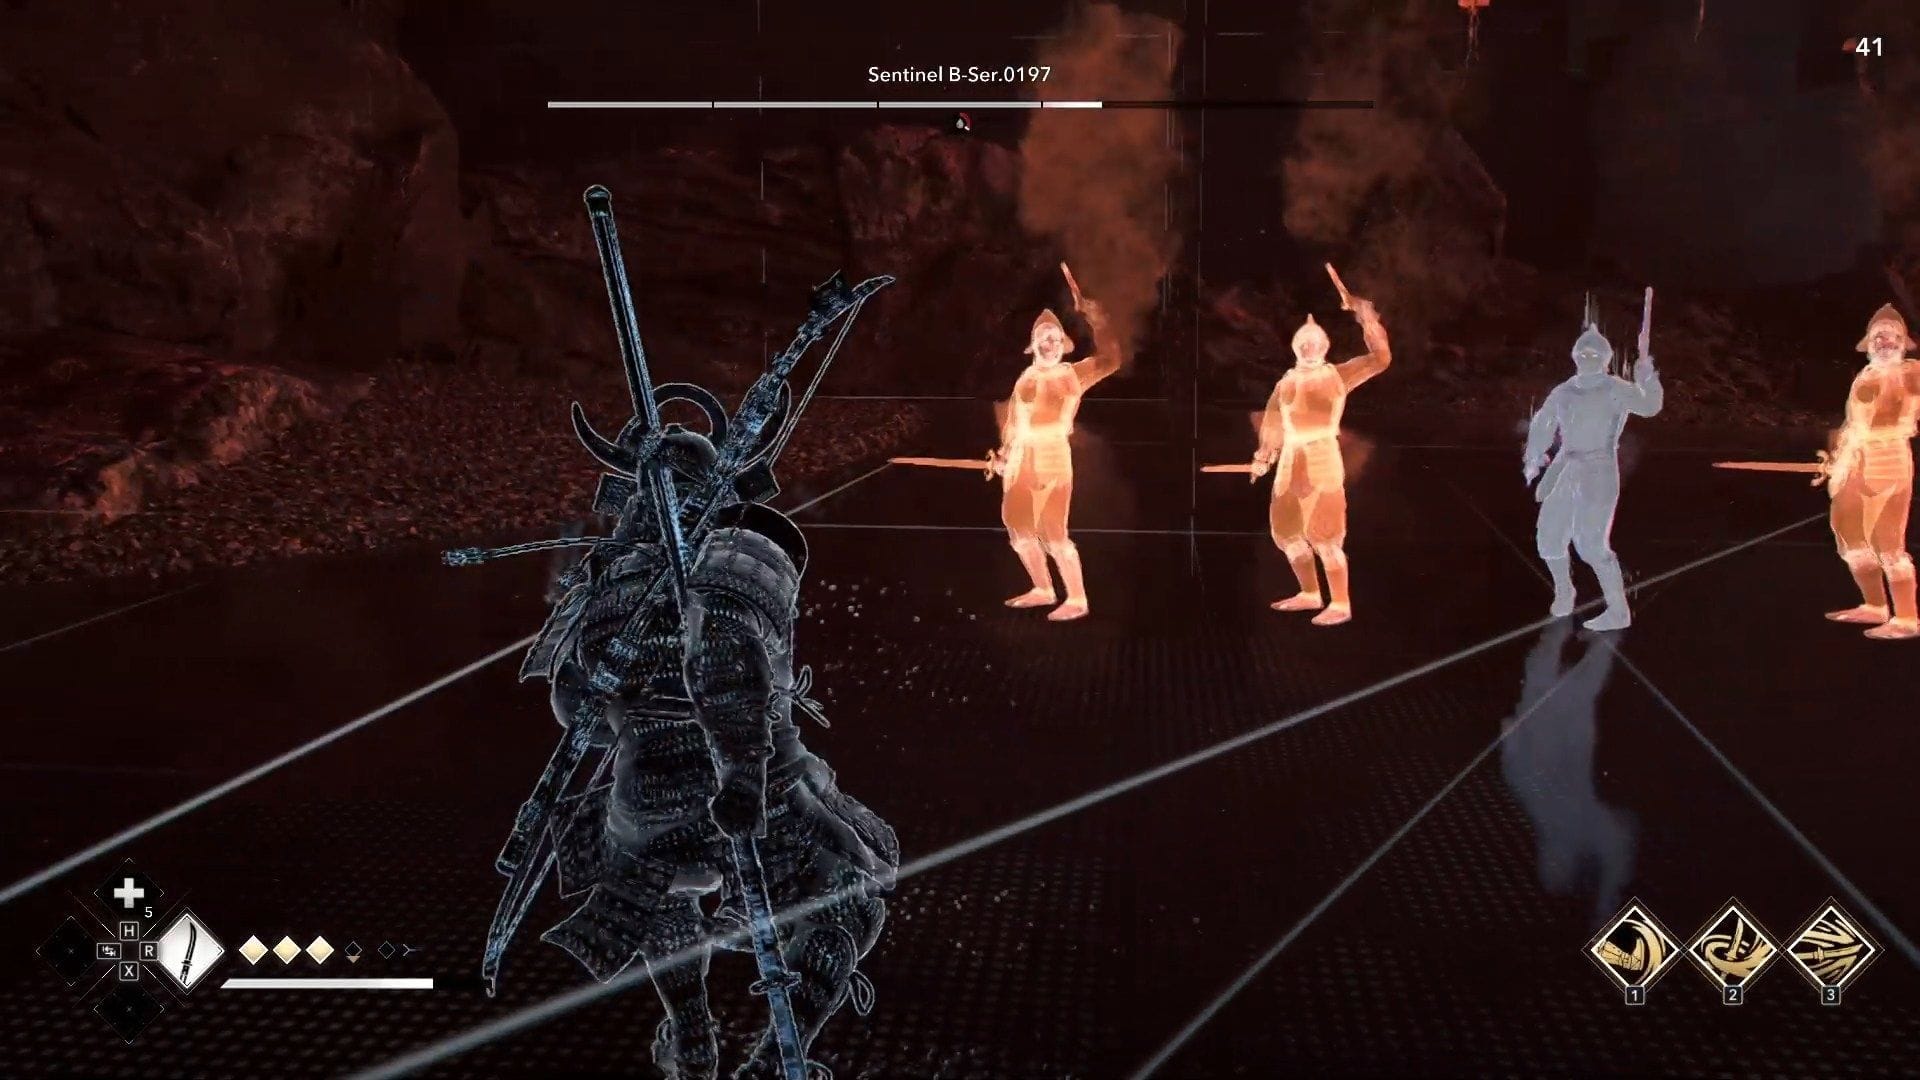
Also, he can teleport to a special location and carry out a ranged assault utilizing his gun. On prime of that, a number of mirror photographs of him execute the assault on the similar time. You can even side-step that assault.

After a bit in the course of the battle, the boss will carry out a floor assault you can be cautious of by seeing the pink glow from the bottom. Move away from him after which dodge the following floor assaults by avoiding the pink glows on the bottom.
While dodging the boss’s assaults, strike on the good time and use Yasuke’s talents to deal harm. If you get hit a number of occasions, you’ll lose his kind. However, a dice can be out there there that you need to use to grow to be Yasuke once more.
Eliminate the boss
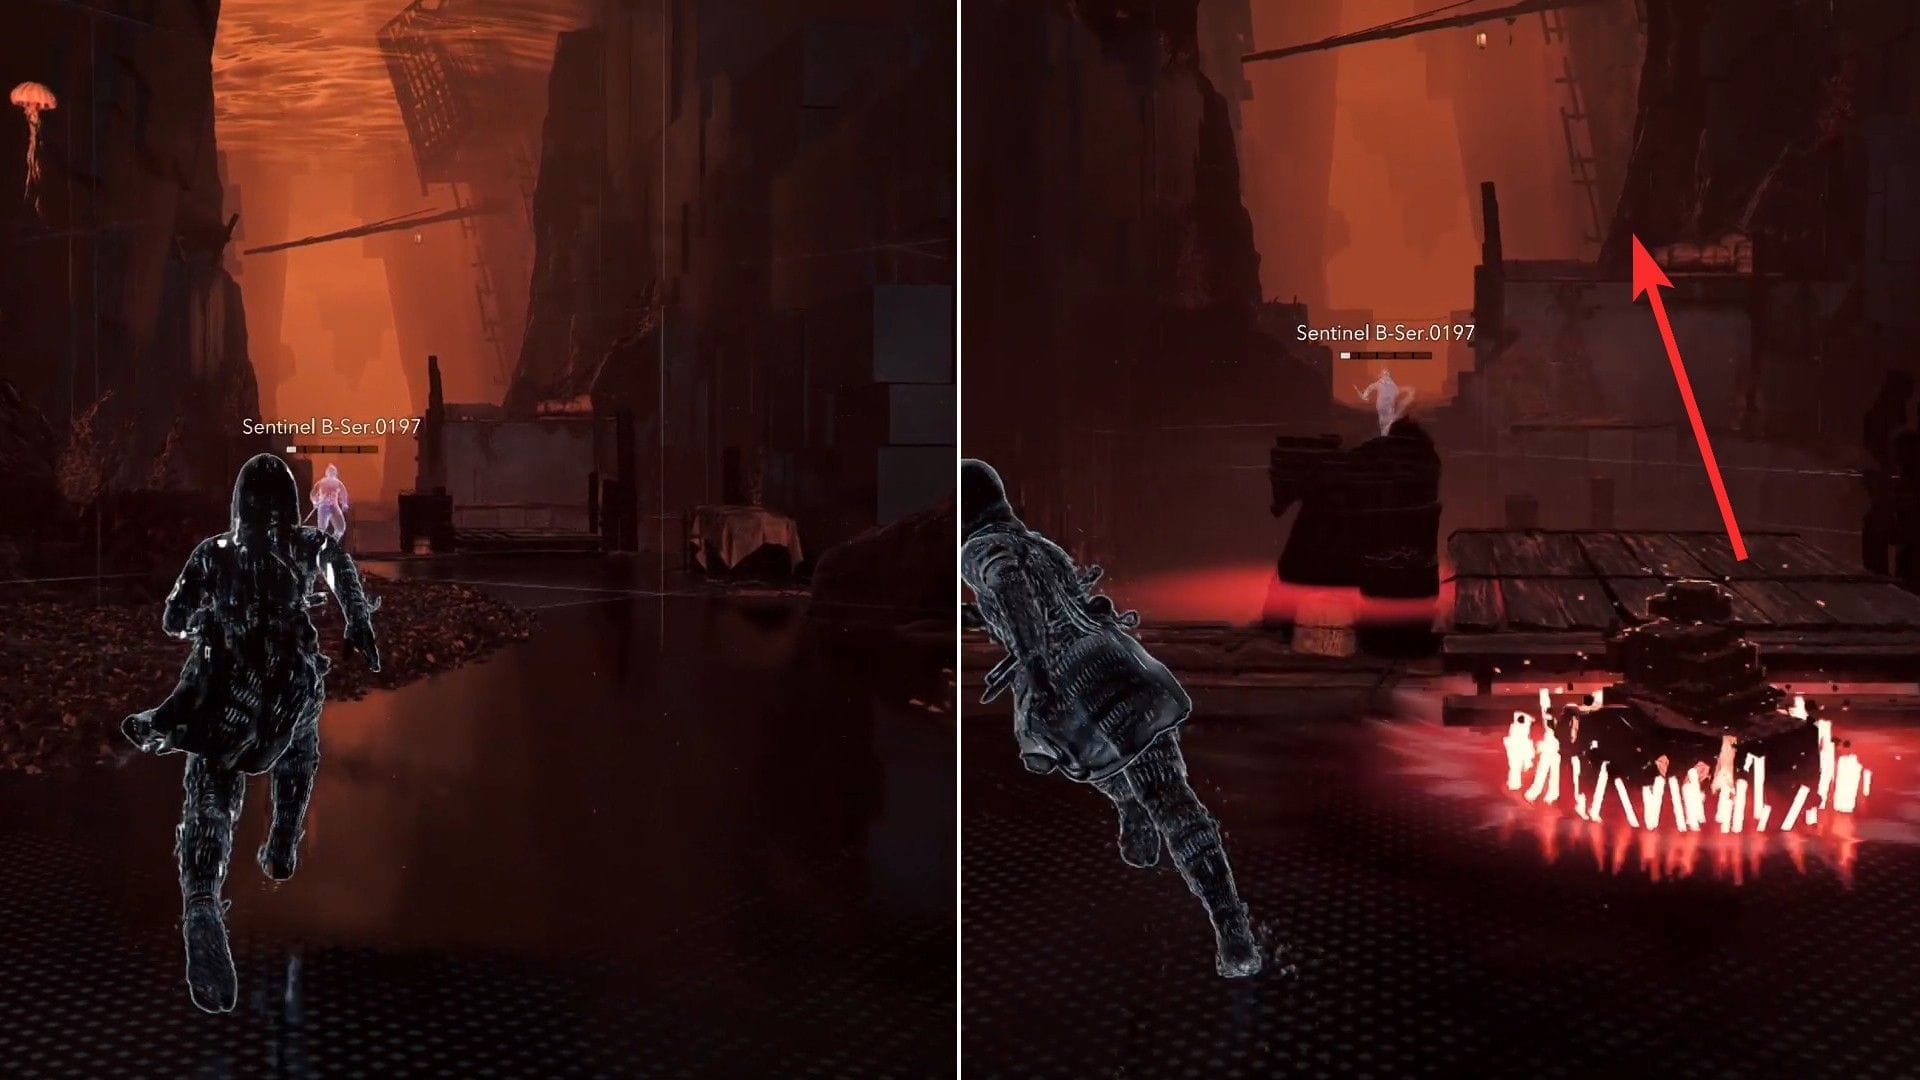
When the boss’s well being bar reaches round 10%, he’ll flee the realm. Chase him, and after a degree, you’ll robotically flip into Naoe. Dodge the enemy assaults, parkour ahead, and climb the platform on the best.
Move ahead, use the grappling hook to succeed in the following platform, cross the gaps, and go to the left facet’s platform utilizing the rope.
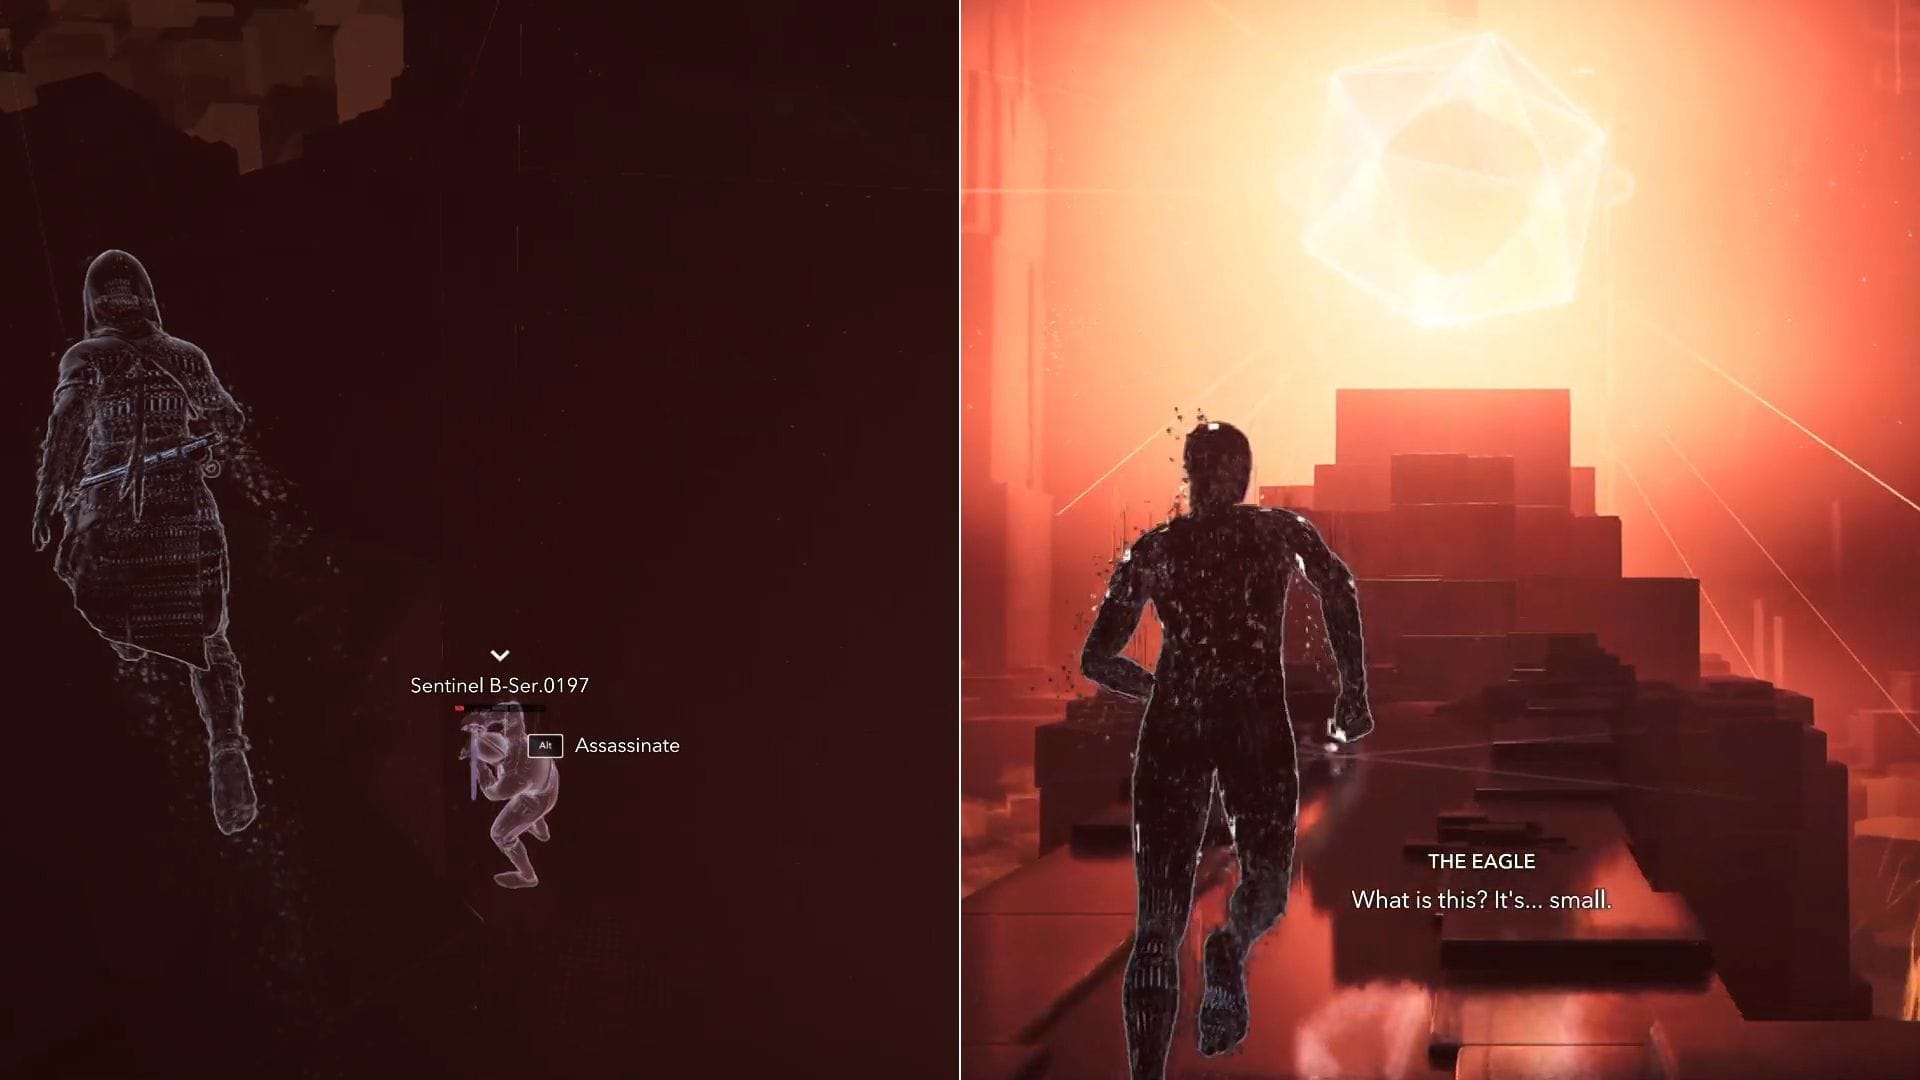
Lastly, assassinate Sentinel B-Ser.0197 from above and proceed ahead to finish the Lost and Found Animus Rift quest in Assassin’s Creed Shadows. You will get the next objects as rewards:
- Dark Strand (Legendary Bo)
- Dark Encryption (Legendary Kanabo)
- Hurtful Criticals (Engraving)
- Painful Power (Engraving)
Also learn: All Kanabo Skills for Yasuke in Assassin’s Creed Shadows
This concludes our walkthrough information for the Lost and Found Animus Rift quest in Assassin’s Creed Shadows.
Check out Assassin’s Creed Shadows gameplay guides from Sportskeeda:
Are you caught on right now’s Wordle? Our Wordle Solver will aid you discover the reply.
Edited by Debayan Saha
Source link
#Assassins #Creed #Shadows #walkthrough #full #Lost #quest #Animus #Rift